 |
| Brilliant Wings Butterfly Birthday Card |
Happy Thursday, y'all! I'm so glad that you're here and hope you are having a wonderful day! Today I am hopping with the Ink & Inspiration Blog Hop as we share inspiration from this lovely Color Challenge. There are several of us hopping today - you will find the list to follow along towards the bottom of my blog post - so sit back and enjoy your favorite coffee, tea, water, or smoothie as we share some handmade projects with you!
Today's Project
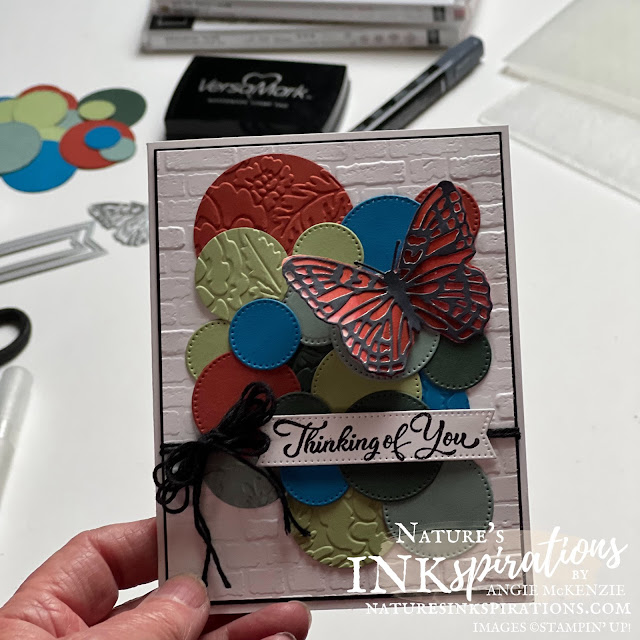
The colors from today's inspiration picture are so lovely. I needed to make a special birthday card for a friend so I went the extra mile with using lots of embossing, die-cutting, fussy cutting and some fun ways to color.
Project Details
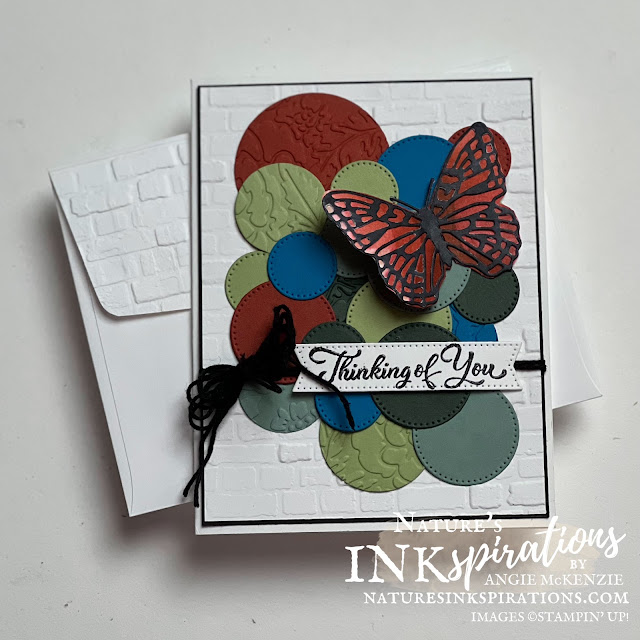
Tempted to use the Faux Sea Glass Shapes and the Pebble Enamel Shapes to create a backdrop for a butterfly, I decided to play with cardstock and some dies instead. Multiple circles were die-cut from each of the colors of cardstock with a variety of Stylish Shapes Dies and Layered Circles Dies. The plain circle die-cuts were embossed with the Pretty Flowers Embossing Folder. The various die-cuts were arranged and adhered to a Basic White cardstock layer embossed with the Brick & Mortar 3D Embossing Folder.
If you've been looking through the new annual catalog, then you might recognize where the idea for this fun background came from (Stampin' Up! 2022-2023 Annual Catalog, page 7)! **wink**
The Brilliant Wings Die was used on 2" wide strip of Basic White Cardstock. The detailed die-cut was colored with the brush tip of the Dark Basic Black Stampin' Blends Marker.
An alcohol ink background was created with the Cajun Craze Ink Refill and a Stampin' Spritzer filled with rubbing alcohol. Basic White cardstock was spritzed followed by 3 drops of ink and lots more spritzing. As the ink started to move around, the cardstock was moved around to disperse the ink further. Using die-cut as a guide, the solid back of each of the wings was fussy cut from the alcohol ink background. Stampin' Seal was applied to the back of the detailed butterfly die-cut and adhered to the corresponding wing color.
After fiddling with the bow, the layers were adhered to a Thick Basic White card base. The delicate butterfly was adhered to the cardfront with Mini Glue Dots.
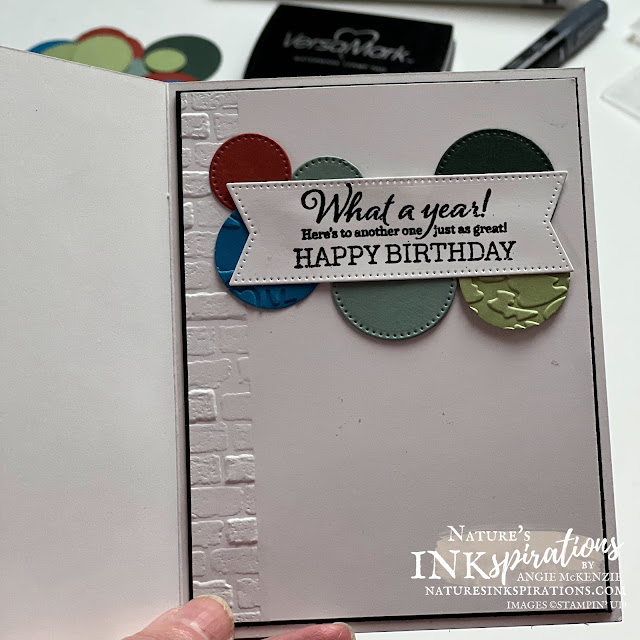
The inside of the card was layered, embossed and stamped to compliment the card front. The heat embossed Graceful Tiles birthday sentiment was perfect for my friend. Due to the thickness of the card for mailing, I opted to emboss the envelope flap to help flex it sealing.
More Inspiration
I hope this project has inspired you and brightened your day. There are some other amazing inspirations for you to see along this blog hop. So glance below at the blog hop list - you are currently visiting my blog, Angie McKenzie - to see who is next as you sure don't want to miss any!


Brilliant interpretation of the picture
ReplyDeleteSuch a clever idea Angie, love all the texture on the circles x
ReplyDeleteBeautiful use of thr colors!
ReplyDeleteAngie, I really like the multiple layers of circles and texture your used for your background. Great Card!
ReplyDeleteLove how you used all the different circles and colours together, such a lovely card! Ann x
ReplyDelete