 |
| Amazing Thanks Die-Cut See-Through Card |
Hello! I'm so glad that you're here and hope you are having a wonderful day! Today I am hopping with some of my talented stamping friends from around the world who love creating with Stampin' Up!® products as much as I do! We love hopping on the second weekends of the month - Saturday or Sunday depending on where you are in the world - and love sharing lots of inspiration with you. There are several of us hopping today - you will find the list to follow along towards the bottom of my blog post - so sit back and relax with your favorite cuppa as you peruse the hop.
This month we are sharing projects featuring Fun-Folds! I am sure that you will find lots of different interpretations and inspiration from this fun theme just in time for Easter.
Today's Project
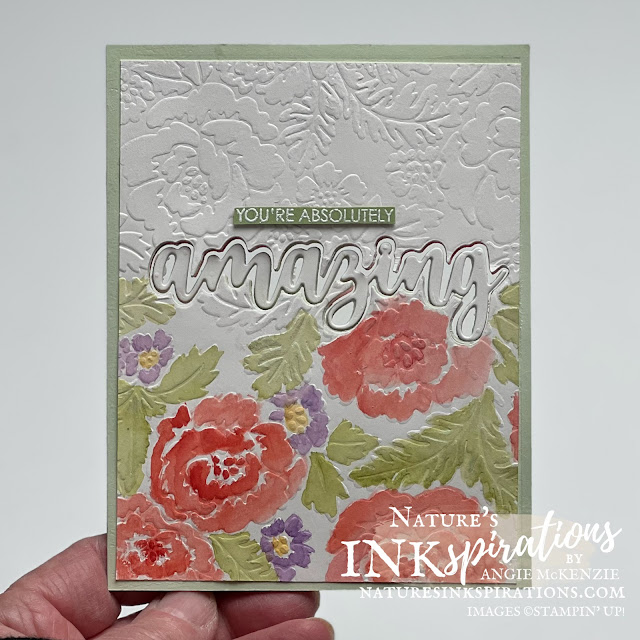
The background for today's fun-fold was inspired by a tip shared by Stampin' Up! Artisan Designer Leah Fadynak earlier this week. I have had this Pretty Flowers Embossing Folder for awhile and have not played with it until I saw this inspiration for this Amazing Thanks Die-Cut See-Through Card.
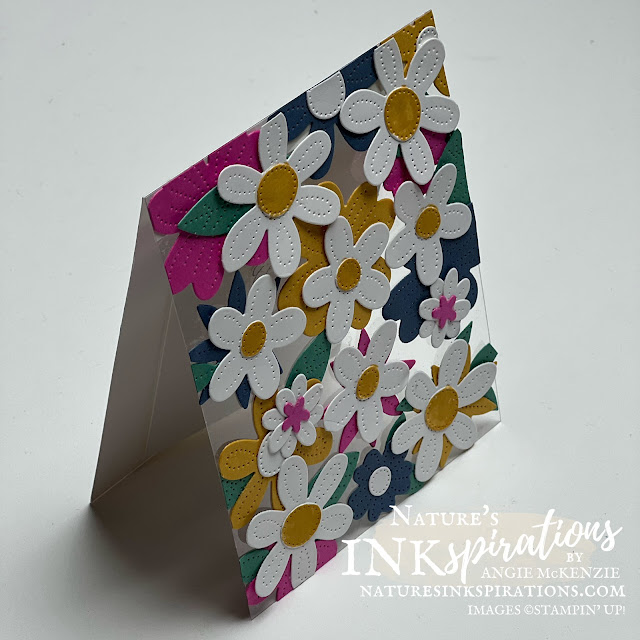
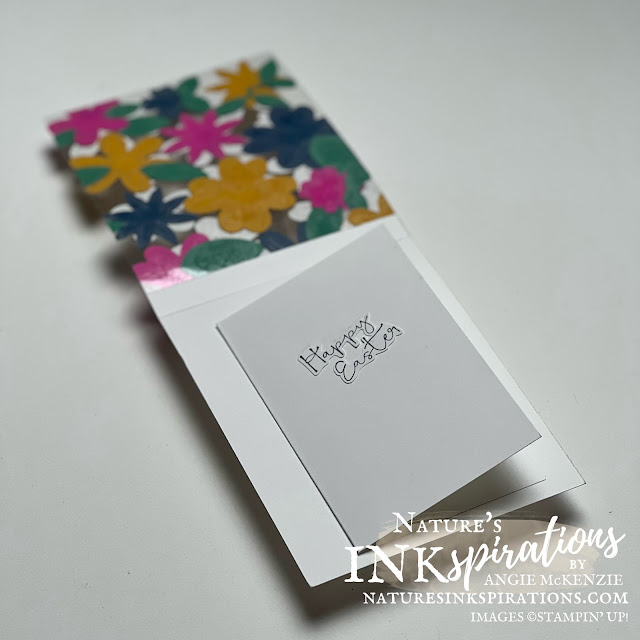
And with Palm Sunday this weekend, I made a Pierced Blooms Die-Cut See-Through Card for Easter as I just couldn't stop with just one of these fun cards!
Project Details
See-Through cards are fun to create as you can make them as simple as you wish or push yourself outside of your comfort zone as I did with today's cards.
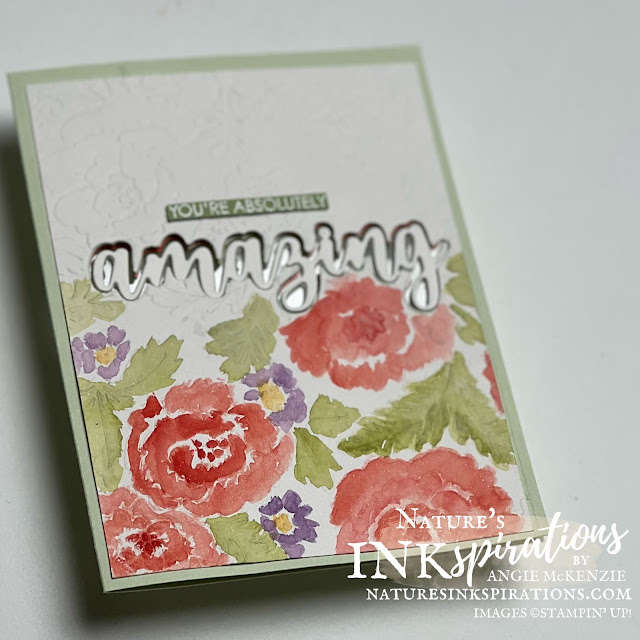
Shimmery White Cardstock was embossed with the Pretty Flowers Embossing Folder. The embossed layer was placed on the front of the folded Soft Sea Foam Card Base and die-cut with the shadow Amazing Thanks Die. An impression made on the card base which was die-cut next. Running it through a second time without removing the die created the complete opening through the card base. A second piece of Shimmery White cardstock was lined up in the inside of the card, die-cut with the shadow die and then partially embossed.
The lower section of the fully embossed Shimmery White layer was watercolored using a damp Water Brush. The ink colors are Calypso Coral, Pear Pizzazz, Highland Heather and So Saffron. The dry watercolored layer was adhered to the card front with liquid glue. The Color & Contours sentiment was stamped with VersaMark onto scraps of Pear Pizzazz cardstock and heat embossed with White Stampin' Emboss Powder. The sentiment was layered up with additional scraps of Pear Pizzazz cardstock and adhered to the card front with liquid glue.
For the inside layer, all of the embossed images were watercolored. Once dry, cut a 2" wide strip of Window Sheets to the same width of the layer and adhered with Multipurpose Liquid Glue to the back of the the watercolored layer. Adhere the watercolor layer to the inside of the card with Multipurpose Liquid Glue being more concerned about aligning the die-cut openings vs the edges of the layer. Please remember that liquid glue gives you plenty of time to wiggle things around for perfect alignment - well, almost perfect. **wink**
Die-cut the detailed sentiment die twice from Shimmery White cardstock and twice from Soft Sea Foam cardstock. You can use the shadow die remnants as I did, but a fresh clean scrap piece was used for the top layer. Layer the detailed die-cuts were layered to match the layering of the card (Shimmery White, Soft Sea Foam, Shimmery White and Soft Sea Foam) and adhere together with Multipurpose Liquid Glue. Once dry, the layer was dusted with my retired Embossing Buddy to eliminate excessive stickiness. Adhere the layered die-cut sentiment to the Acetate with Multipurpose Liquid Glue. The heat embossed sentiment from the retired Rise & Shine Sale-a-Bration Stamp Set was trimmed and adhered with Multipurpose Liquid Glue.
Needing another Easter card, I couldn't resist making another see-through card showcasing some retiring products - the Pierced Blooms Dies and the 2020-2022 In Colors.
Cut a card front size piece of Window Sheet. Cut a Thick Basic White Cardstock as a vertical top folding card base and trim the front off except for 1/2" across the top... you will adhere the decorated window sheet card front to this strip later on. Die-cut various elements from Magenta Madness, Misty Moonlight, Just Jade and Bumblebee 2" strips of cardstock. Arrange in layers onto the Window Sheet adhering with Multipurpose Liquid Glue. Trim off any overhanging edges. You may choose to die-cut the flower centers from Basic White cardstock and color them with the coordinating Stampin' Write Markers as I did for the Bumblebee centers. Once dry, adhere the layered Window Sheet to the 1/2" strip across the top of the card base.
Using Thick Basic White as the card base a smaller additional card was trimmed to fit hidden behind the see-through layer. The Easter Friends sentiment was stamped with Tuxedo Black Memento ink onto Basic White scraps and fussy cut. The sentiment was strategically placed on the inside layer to not show from the front and adhered with Multipurpose Liquid Glue. The inside sentiment was also stamped with Memento ink.
More Inspiration
I hope that you have enjoyed these See-Through fun-fold cards and will use them as inspiration to create some cards for friends and family. Up next on the blog hop is Tricia where you can continue along to see her amazing fun-fold and what all the others have created. I am sure you will be filled with lots of inspiration! And should you be inspired, please leave us a comment... we love to hear from you.
Angie McKenzie ● Tricia Butts ● Aurélie Fabre
Karen Egan ● Teri West ● Gez Carpenter
Susan Webster ● Rochelle Laird-Smith ● Sue Allen
Jill Chapman ● Leonie Stuart ● Karen Henderson
Mo Rootes ● Rebecca-Jo Unwin ● Danielle Kassing
Vickie Littlewood ● Marieke Bart ● Robbie Susan Chandler
Terry Hamilton ● Jan Musselman ● Kimberley Morris







Both cards are really fun.
ReplyDeleteGreat cards! I really need to use that embossing folder.
ReplyDeleteSuch a cool idea, Angie! They are both beautiful cards. Thanks for sharing!💕
ReplyDeleteGreat cards Angie, must have a go x
ReplyDeleteBeautiful cards Angie x
ReplyDeleteWhat a wonderful idea Angie. The effect is stunning - I will be adding a see through card to my list of techniques to try!
ReplyDeleteThere is always incredible technical work in each of your Angie creations and it is simply fantastic. It took me a while to figure out how the map was made - despite reading the article - but it's a great idea. And coloring took you so long! The person who receives this card had better be WOW!
ReplyDeleteThe second is great too. I like to work on the principle of windows like that and this shower of flowers is fantastic! Thank you for all this inspiration!
Stanning Cards Angie, Thanks for sharing.
ReplyDelete