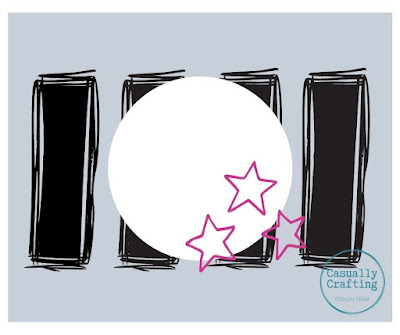
Hello and welcome to my blog! Today I am hopping with the Casually Crafting Design Team! This month's theme is a Sketch Challenge so there are sure to be quite a few inspirations to get your mojo going with some creativity. There are several of us hopping today - you will find the list to follow along towards the bottom of my blog post - so sit back and enjoy your favorite coffee, tea, water or smoothie as we share some handmade projects with you!
Today's Project
The 2021-2022 Annual Catalog is retiring soon. So many products have already retired that were on the Last Chance List; however, I chose to play with the retiring 2021-2023 In Color 6" x 6" Designer Series Paper which is still available.
Project Details
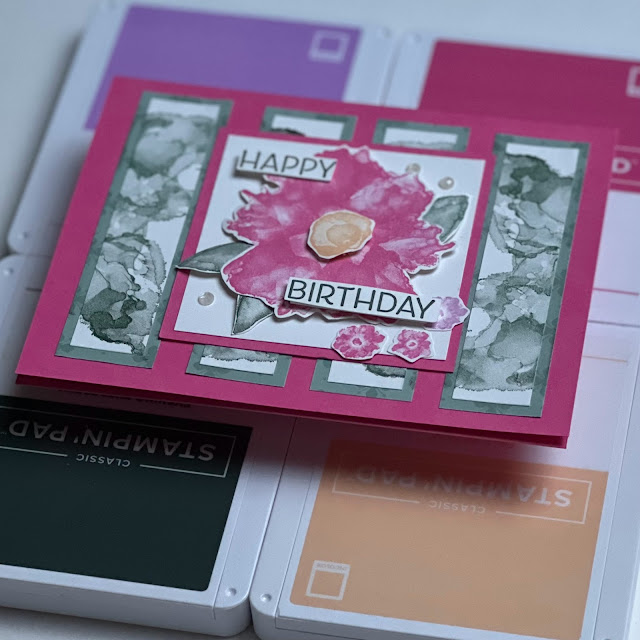
Birthday cards are always needed in my stash of cards so Artistically Inked was calling my name based on the sketch. The large single flower, the trio flower grouping, the floral center and the leaves were stamped, fussy cut and arranged on a square layer of Basic White Cardstock.
Strips of Basic White Cardstock were adhered to strips of Soft Succulent 6" x 6" Designer Series Paper. The large watercolor image was stamped with Soft Succulent ink onto the assembled strips. Starting with the ends and working to the center, the stamped strips were adhered to the Polished Pink card front with Multipurpose Liquid Glue.
The Basic White square was adhered to a Polished Pink layer. The bloom, center and leaves were rounded downwards with a bone folder for added dimension before adhering to the square panels. The flower was assembled and adhered with Stampin' Dimensionals and Mulitpurpose Liquid Glue. The sentiment was stamped, fussy-cut, layered up with scraps and adhered to the flower panel. Elegant Faceted Gems were added as a finishing touch.
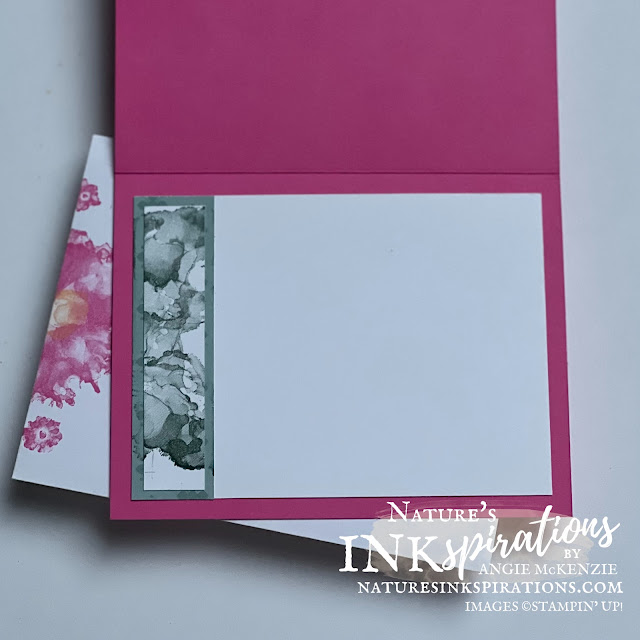
The inside was layered to compliment the card front allowing plenty of room for an additional stamped sentiment when ready to send along with a special hand-written note to the birthday recipient. The Basic White Medium Envelope front and flap were stamped to compliment the card front.
More Inspiration
I hope you have been inspired by my project and the sketch. Now it's time to continue along the blog hop - you're currently with me, Angie McKenzie, at #3 - to get more inspiration from the others... so look at the list below and continue along. You definitely don't want to miss any.
Thanks for stopping by my little corner of the world!
You Can Make This Card!
Here's What You'll Need to Get Started...
BASICS
- Clear Blocks A, D, E, H; Stamparatus; Small Grid Paper; Paper Trimmer; Paper Snips; Multipurpose Liquid Adhesive; Stampin' Dimensionals
- Clear Blocks A, D, E, H; Stamparatus; Small Grid Paper; Paper Trimmer; Paper Snips; Multipurpose Liquid Adhesive; Stampin' Dimensionals
STAMPS
- Artistically Inked Cling Stamp Set (bundled savings with the Artistic Dies)
- Artistically Inked Cling Stamp Set (bundled savings with the Artistic Dies)
INK
- Polished Pink, Pale Papaya, Fresh Freesia and Evening Evergreen Classic Stampin' Pads
- Polished Pink, Pale Papaya, Fresh Freesia and Evening Evergreen Classic Stampin' Pads
PAPER
- Polished Pink and Basic White Cardstocks; 2021-2023 In Color 6" x 6" (15.2 x 15.2 cm) Designer Series Paper; Basic White Medium Envelopes
- Polished Pink and Basic White Cardstocks; 2021-2023 In Color 6" x 6" (15.2 x 15.2 cm) Designer Series Paper; Basic White Medium Envelopes
OTHER
- Elegant Faceted Gems
- Elegant Faceted Gems
You can purchase any of these supplies from my online store if you live in the USA and do not already have a Stampin' Up!® demonstrator.
Time to Use Your Paper Trimmer!
PAPER CUTS
- Basic White - 1/2" x 3-1/2" (x5); 3-3/4" x 5"; approx. 4-1/4 x 5-1/2" for stamping and fussy-cutting
- DSP - 3/4" x 3-3/4" (x5)
- DSP - 6" x 6" for envelope insert
- Polished Pink - 5-1/2" x 5-1/2" scored at 4-1/4" (card base); scraps for layer
- Basic White - 1/2" x 3-1/2" (x5); 3-3/4" x 5"; approx. 4-1/4 x 5-1/2" for stamping and fussy-cutting
- DSP - 3/4" x 3-3/4" (x5)
- DSP - 6" x 6" for envelope insert
- Polished Pink - 5-1/2" x 5-1/2" scored at 4-1/4" (card base); scraps for layer


No comments
Post a Comment
Thanks so much for taking the time to post a comment. Your comments make me smile!