 |
| CAS(e) the Mini Switchroo with Hello Ladybug Driving By |
Hello and welcome to the Around the World on Wednesday Blog Hop! We are glad you have joined us and look forward to spending time with you as we share inspiration with you from the January-June 2022 Mini Catalog by switching things up a bit thus our theme of CAS(e) the Mini Switcharoo. So sit back and enjoy your favorite cuppa as you enjoy your trip Around the World on Wednesday!
Today's Project
With the CAS(e) the Mini Switcharoo we each picked something to CAS(e) - Copy And Selectively (E)dit - from the new 2022 mini catalog; however, we could not use the same colors or products. Two of us did select projects created by one of the Stampin' Up! Concept Artists who won the Master Stamper contest during OnStage@Home in November so these two team members could use the same products and/or colors with their projects. I cannot wait to see how everyone interpreted this fun challenge!
Here is what I chose to create by selecting a project on page 18 of the January-June 2022 Mini Catalog.
Project Details
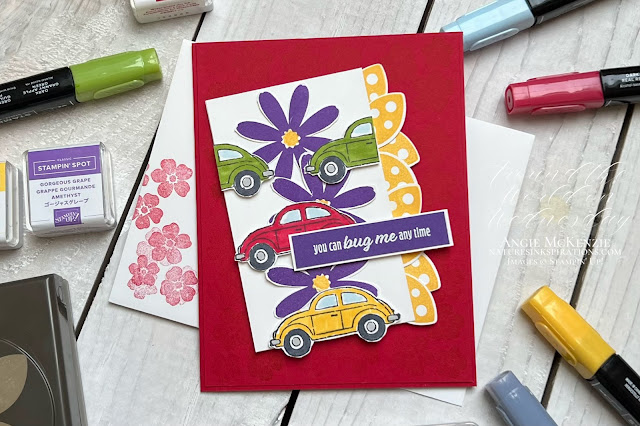
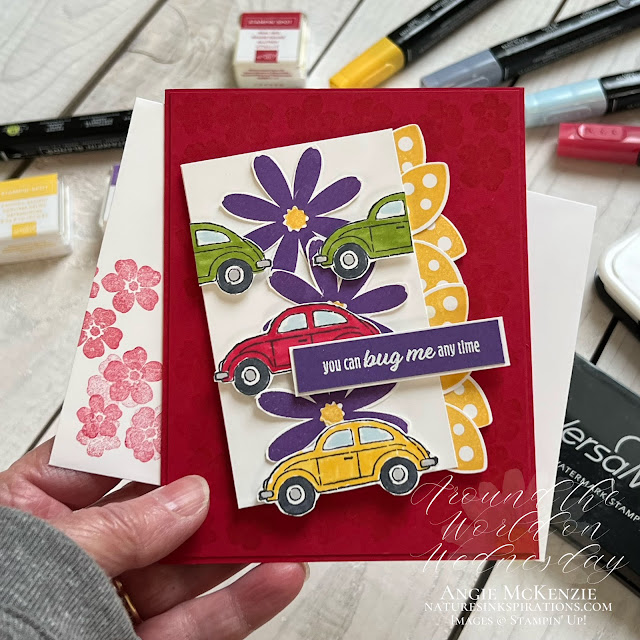
I could not resist using the Driving By Sale-a-Bration Cling Stamp Set for this fun challenge as this adorable VW Bug (yes, I love "Herbie the Love Bug" plus a dear family friend from my childhood had a yellow one) was perfect for coordinating with the new Hello Ladybug Stamp Set.
The Hello Ladybug flower cluster was stamped repeatedly with Real Red ink along the outside edge of the Real Red cardstock layer. The ladybug wings were stamped with Daffodil Delight ink onto 1/2" x 4" strips of Basic White cardstock scraps (perfect size for two sets of wings) and punched with the coordinating Ladybug Punch. The wings were attached to a 2-3/4" x 4" piece of Basic White cardstock with Tear & Tape Adhesive. Basic White cardstock scraps were used to even up the layer. TIP: Stamp the wings in opposite directions matching the direction of the punch.... stamped it on the wrong side? No worries... just flip it over and stamp again correctly.
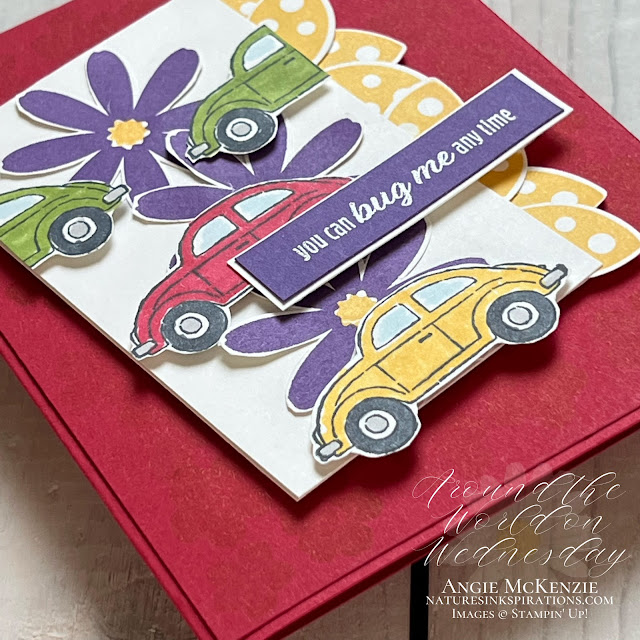
The daisies were stamped with Memento and Gorgeous Grape inks and the center with Daffodil Delight on Basic White cardstock scraps. The VW Bugs were stamped with Memento and colored with Stampin' Blends Markers, The fussy cut daisies were adhered with liquid glue and the fussy cut VW Bugs were adhered with Stampin' Dimensionals. TIP: Stamp the car top along the edge(s) of your cardstock unless you want to fussy cut the packages, too, for another project. Stamp the daisies on your Stamparatus foam mat or your piercing mat for a solid, full coverage image.
The Hello Ladybug sentiment was stamped with Versamark ink onto a 1/2" strip of Gorgeous Grape cardstock and heat embossed with White Stampin' Emboss Powder.and layered with slightly larger Basic White cardstock layer. The sentiment layer was adhered with Stampin' Dimensionals and Multipurpose Liquid Glue.
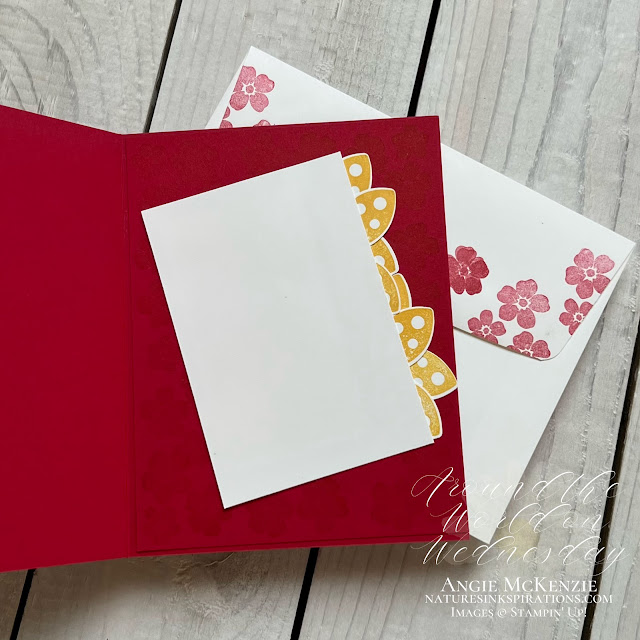
The inside layers were replicated to compliment card front leaving plenty of room to write a quick note to a special recipient. The envelope front and flap was stamped with cluster flowers used for background layers.
THE AWOW TEAM
THIS IS US
We are such a diverse and fun group of stampers from all over the world! Seventeen (17) of my Stampin' Up! Demonstrator friends are joining me today in this worldwide hug that stretches all the way from New Zealand to Hawaii across twelve different time zones. We love sharing sunshine with you through projects from our individual parts of the world on these second Wednesdays of the month. I hope that you are being filled with lots of inspiration.
More Inspiration
I hope this project has helped you imagine different ways you can create cards using this layout and/or products from the new January-June 2022 Mini Catalog. Now, hop along with me, Angie McKenzie, to see more Wednesday inspirations from my amazing friends Around the World. Just click the daisy below to go to my friend, Wendy, as she shares her amazing project, or scroll down the name list to follow along because you sure don't want to miss any.
You Can Make This Card!
Here's What You'll Need to Get Started...
BASICS
- Clear Blocks A, B, C, D; Stamparatus; Small Grid Paper; Paper Trimmer; Paper Snips; Heat Tool; Tear & Tape Adhesive; Multipurpose Liquid Adhesive; Stampin' Dimensionals
- Clear Blocks A, B, C, D; Stamparatus; Small Grid Paper; Paper Trimmer; Paper Snips; Heat Tool; Tear & Tape Adhesive; Multipurpose Liquid Adhesive; Stampin' Dimensionals
STAMPS
- Hello Ladybug Photopolymer Stamp Set (included in the Hello Lady Bundle with the Ladybug Punch for bundled savings); Driving By Cling Stamp Set (earn for FREE during Sale-a-Bration with a qualifying order)
- Hello Ladybug Photopolymer Stamp Set (included in the Hello Lady Bundle with the Ladybug Punch for bundled savings); Driving By Cling Stamp Set (earn for FREE during Sale-a-Bration with a qualifying order)
INK
- Classic Stampin' Spots Assortment Set; Tuxedo Black Memento Ink Pad; VersaMark Pad; Real Red, Daffodil Delight, Balmy Blue, Basic Black, and Smoky Slate Stampin' Blends Combo Packs
- Classic Stampin' Spots Assortment Set; Tuxedo Black Memento Ink Pad; VersaMark Pad; Real Red, Daffodil Delight, Balmy Blue, Basic Black, and Smoky Slate Stampin' Blends Combo Packs
PAPER
- Real Red, Gorgeous Grape and Basic White Cardstocks; Basic White Medium Envelopes
- Real Red, Gorgeous Grape and Basic White Cardstocks; Basic White Medium Envelopes
OTHER
- Ladybug Punch (included in Hello Ladybug Bundle)
- Ladybug Punch (included in Hello Ladybug Bundle)
You can purchase any of these supplies from my online store if you live in the USA and do not already have a Stampin' Up!® demonstrator.
Time to Use Your Paper Trimmer!
PAPER CUTS
- Basic White - 2-3/4" x 4" (x4); 9/16" strip for layering behind sentiment; 1/2" strips for stamping wings; approx. 1/4 sheet for stamping; scraps for layering
- Gorgeous Grape - 1/2" strip for heat embossing sentiment
- Real Red - 8-1/2" x 5-1/2" scored at 4-1/4" (card base); 4-1/8" x 5-3/8" (x2)
- Basic White - 2-3/4" x 4" (x4); 9/16" strip for layering behind sentiment; 1/2" strips for stamping wings; approx. 1/4 sheet for stamping; scraps for layering
- Gorgeous Grape - 1/2" strip for heat embossing sentiment
- Real Red - 8-1/2" x 5-1/2" scored at 4-1/4" (card base); 4-1/8" x 5-3/8" (x2)


So cute
ReplyDeleteThanks so much! :)
DeleteThat's a clever re-working, Angie. The wings for the curvy element along the side is very nice indeed.
ReplyDeleteThanks so much, Jan! x
DeleteWauw. You really did a great job! To combination of products is amazing.
ReplyDeleteThanks so much, Danielle! It was so fun to create. :)
DeleteWhat a bright, fun card - so cute!
ReplyDeleteThanks so much, Melissa! :)
DeleteSuch a clever use of the lady bug wings Angie x
ReplyDeleteThank you, Rochelle! Definitely something fun to create... nothing like a polka dot border, right?!? :)
DeleteHi there. What stamp set did the daisy come from? Thanks! I love your card and how you combined the different stamp sets!
ReplyDeleteHello Shauna! The daisy is from the Hello Ladybug Stamp Set which is available with the Ladybug Builder Punch in a bundle for additional savings.
Delete