 |
| Nature's Prints thank you for my customers! |
Hello and welcome to my blog! Today I am hopping along with other members of Bruno and Kylie Bertucci's Stampin' Up!® Demonstrator Training Program. I have learned so much through this training group since I first became a demonstrator that I had to participate in it once again as there is always something to learn. We love doing our Monthly Team Blog Hops with our general theme for all the hops being customer and team thank you cards.
Today's Project
Today's project is a thank you card that I am providing to my customers this month as a thank you for their orders. New catalogs are always such exciting times with lots of new things to see and inspire us to want to create even more than we do. I love spoiling my customers and I hope that they enjoy my gratitude as much as I enjoy sharing new ideas and techniques with them.
Project Details
It's that time of year where I love to bring out the baby wipes for creating my own ink pad with the ink refills to create fall foliage. Drops of Garden Green, Crushed Curry, Pumpkin Pie, Cajun Craze and Cherry Cobbler were used to create the baby wipe ink pad which was laid on my Clear Block D. The Nature's Prints Stamp Set has a solid image that I couldn't resist playing with along with using the coordinating Natural Prints Dies. The image was stamped multiple times on Very Vanilla cardstock. An extra image was stamped with Crumb Cake ink.
The Timeworn Type 3D Embossing Folder was used for the weathered Very Vanilla background. A portion of the raised sections were sponged with Crumb Cake ink. The edges of the cardstock were distressed with the Bone Folder along with curling the upper right corner.
Crumb Cake Baker's Twine was cut and separated into two separate pieces. The three stranded twine was doubled wrapped around the card and tied off with a knot. The two stranded twine was doubled and tied around the knot into a bow and trimming the ends for a finished look. The Biggest Wish thanks was stamped in Crumb Cake ink onto the Painted Labels die cut. Rustic Metallic Adhesive Backed Dots were added as a finishing touch.
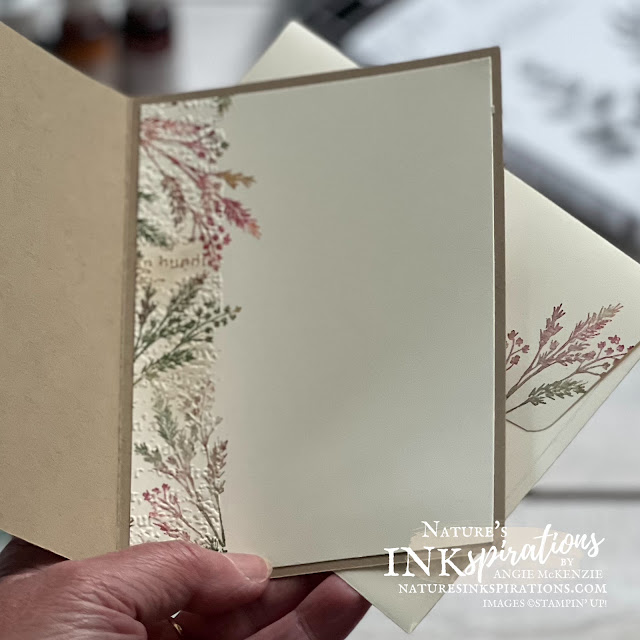
The inside was layered and stamped to compliment the card front. The Very Vanilla Medium Envelope front and flap was stamped to give my customers inspiration for decorating our amazing envelopes! There is nothing like completing the process of cardmaking with these special touches.
More Inspiration
Thank you so much for visiting my blog today and being a part of this hop with us! There is such an amazing line up of Stampin' Up!® Demonstrators from around the world, and I know you're going to enjoy all the incredible projects you are going to see on this blog hop. So glance below at the September Blog Hop List - you are currently at my blog, Angie McKenzie (#4 on the list) - to see who is next as you sure don't want to miss one blog link during our last blog hop together for this year's training! Some of us will be back next month as part of another start to a year's worth of training.
You can purchase any of these supplies from my online store if you live in the USA and do not already have a Stampin' Up!® demonstrator.


Simple and beautiful!
ReplyDeleteLove your card. Great to use colors other than what is in the suite. So pretty!
ReplyDeleteBeautiful card!
ReplyDeleteBeautiful card Angie! Ann xx
ReplyDeleteAbsolutely gorgeous card inside and out. Thank you Angie for taking part in our Demonstrator Training Blog Hop this month.
ReplyDeleteLove your card just beautiful Angie
ReplyDeleteBeautiful card; using the baby wipes and reinkers is brillant.
ReplyDeleteSuch a pretty card Angie, love the shabby chic effect of the card x
ReplyDeleteThere are so many lovely textures on your card. Beautiful.
ReplyDeleteVery elegant card! I love the whole card but especially the way you did the inside.
ReplyDeleteLovely classic elegant card
ReplyDelete