 |
| Eden's Garden and Heartfelt Wishes |
Hello and welcome to my blog! Today I am hopping along with other members of Bruno and Kylie Bertucci's Stampin' Up!® Demonstrator Training Program. I have learned so much through this training group since I first became a demonstrator that I had to participate in it once again as there is always something to learn. We love doing our Monthly Team Blog Hops with our general theme for all the hops being customer and team thank you cards.
Today's Project
Today's project is a thank you card that I am providing to my customers this month as a thank you for their orders. New catalogs are always such exciting times with lots of new things to see and inspire us to want to create even more than we do. I love spoiling my customers and I hope that they enjoy my gratitude as much as I enjoy sharing new ideas and techniques with them.
Project Details
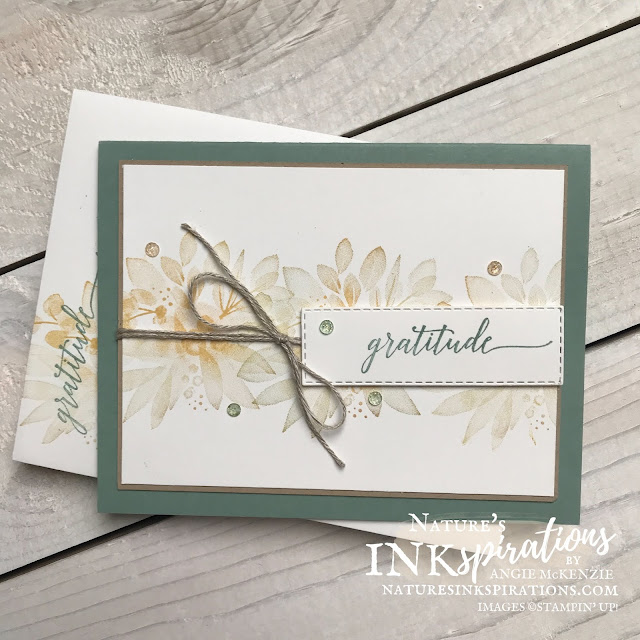
A Clean and Simple card for my customers this month showcases the early release of Eden's Garden. The largest image was stamped with So Saffron ink and sponged with Pear Pizzazz ink using a Blending Brush for a soft effect. You may also use a sponge dauber. The image was cleaned and reinked after each stamped image to prevent contamination of ink colors on the ink pads.
The Heartfelt Wishes sentiment was colored with a Soft Succulent Stampin' Write Marker, as the entire sentiment was not being used, and stamped onto a scrap piece of Basic White Cardstock. The sentiment was then die-cut using the 2nd smallest narrow rectangle from the Stitched Rectangle Dies.
The Basic White Cardstock layer was adhered to a Crumb Cake layer. Linen Thread was double wrapped around the adhered layers and tie-off with a bow. The sentiment die-cut was adhered with Stampin' Dimensionals. Two additional Crumb Cake scrap layers were cut to size to level layer up the adhered layers for a slight floating effect. The layers were adhered to a Soft Succulent Card Base. Genial Gems were the perfect finishing touch to compliment the soft colors of stamped images.
The layers were replicated for the inside of the card along with stamping. The envelope front and flap were also stamped to provide a sneak peek as to what's inside for the recipient.
More Inspiration
Thank you so much for visiting my blog today and being a part of this hop with us! There is such an amazing line up of Stampin' Up!® Demonstrators from around the world, and I know you're going to enjoy all the incredible projects you are going to see on this blog hop. So glance below at the November Blog Hop List - you are currently at my blog, Angie McKenzie (#48 on the list) - to see who is next as you sure don't want to miss one blog link during our second blog hop together for this year's training! Some of us are returning from last year's training group, but you will see several new names so please be sure to share some love of our projects.


This is an elegant and sophisticated card. I surely will want to CASE it.
ReplyDeleteYour card and technique are stunning. Thank you for sharing the technique with us.
ReplyDeleteJust beautiful Angie x
ReplyDeleteSuch a softly, pretty card Angie, love it x
ReplyDeletePretty subtle card. Thanks for sharing
ReplyDeleteLove it!
ReplyDeleteOh my gosh Angie I love your card! This is a fav technique of mine, I needed the reminder 🙂 thank you! Beautiful choice of colours 👏👏
ReplyDeleteSo pretty and feminine! Love the blending brush for the soft effect! Thank you Angie for taking part in our Demonstrator Training Blog Hop this month.
ReplyDeleteBeautiful card! Great layout!
ReplyDelete