Hello friends! I hope you are doing amazing on this thankful Thursday. Today I am hopping with some Crafty Collaborators along the Stampin' Dreams Blog Hop as we share lots of inspiration for different levels of cardmakers (beginner, casual and avid) or creating a simple stamping project and elevating it. There are several of us hopping today - you will find the list to follow along towards the bottom of my blog post - so sit back and enjoy your favorite coffee, tea, water or smoothie as we share some handmade projects with you!
Today's Project
Hopping along this blog hop always feels like home to me as it was the first non-RAK Group blog hop that I first participated in four years ago before I became a demonstrator. So it was only fitting to create with the Feels Like Home Cling Stamp Set available from the SALE-a-bration products that can be earned for free from Stampin' Up! when you make a purchase between now and 30 September 2021.
Project Details
The Stamparatus was used to create the partial images for these 4-1/4" square cards. Place a 4" square of Very Vanilla Cardstock on the Small Grid Paper of the Stamparatus platform. Center the large image as much as possible and lower the Plate to pick up the image. Take the Plate off the Stamparatus to align the bottom of door level with the closest grid line. Return the Plate to the Stamparatus. Tear a 5" piece of scrap paper in half and align the torn edges 1" in on each side of the Very Vanilla cardstock. Stamp the image with Soft Suede ink onto the cardstock. Remove the scrap paper and trim the cardstock to 3-1/2" square centering the image as you trim.
Layer the stamped image onto a Soft Suede 3-5/8" cardstock square and a Very Vanilla 4" cardstock square. Adhere the layers to a Very Vanilla Thick card base.
The additions of an embossed layer and coloring the images with watercolor pencils and a Blender Pen elevates this card to another level whilst keeping it in its original Clean and Simple style. And coloring the door knocker with the Bronze Stampin' Blends Marker gives it a special touch, too.
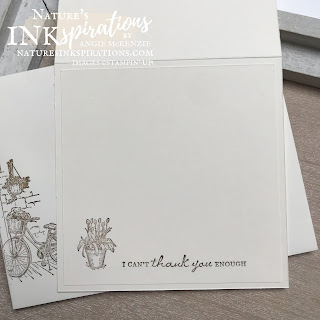
No card is complete without stamping the inside and, of course, the envelope front and flap. This simple additions make our cardmaking so much more enjoyable for the recipients along with our handwritten correspondence.

More Inspiration
You Can Make This!
What You'll Need to Get Started...
BASICS
BASICS
- Paper Trimmer, Stamparatus, Small Grid Paper, Clear Blocks Bundle, Stampin' Cut & Emboss Machine, Multipurpose Liquid Glue
STAMPS
- Feels Like Home Cling Stamp Set
INK
- Soft Suede Classic Stampin' Pad; Bronze & Ivory Stampin' Blends Combo Pack; Watercolor Pencils, Watercolor Pencils Assortment 2; Blender Pens
PAPER
- Very Vanilla, Very Vanilla Thick, and Soft Suede Cardstocks
OTHER
- Brick & Mortar 3D Embossing Folder
You can purchase any of these supplies from my online store if you live in the USA and do not already have a Stampin' Up!® demonstrator.
Time to Use Your Paper Trimmer!
PAPER CUTS (per card)
- Very Vanilla Thick - 8-1/2" x 4-1/4" scored at 4-1/4" (card base)
- Very Vanilla - 4" x 4" (x2), 3-1/2" x 3-1/2" (x2)
- Soft Suede - 3-5/8" x 3-5/8" (x2)


Pretty cards!
ReplyDeleteThank you, Melva!
DeleteBeautiful cards
ReplyDeleteThanks so much, Donna! :)
DeleteWow love these cards. Thanks for sharing
ReplyDeleteThank you, Diane. I do love to share what I love!
DeleteLove both versions of the cards, but really love the coloring on the stepped up card.
ReplyDeleteThanks so much, Candi. So glad you appreciate the coloring details.
DeleteLove this set and your colouring on it too!
ReplyDeleteIt is a wonderful set indeed! Can't wait to see what you've created with this stamp set. :)
DeleteGreat cards
ReplyDeleteThank you, Vickie!
Delete