 |
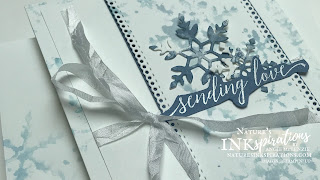
| Sending love this Christmas! |
Happy Saturday and welcome to my blog! Today I am hopping along the Ink.Stamp.Share Monthly Blog Hop as we share projects which we have created for Christmas in July with any current products. We hope that we inspire you to create along with us. There are several of us hopping today - you will find the list to follow along towards the bottom of my blog post - so sit back and enjoy your favorite coffee, tea, water or smoothie as we share some handmade projects with you!
Today's Project
I had so much fun creating today's project! In fact, I ended up making three all from the concept of one idea that led to another. So I will highlight my favorite with you today but you will have to pop by later to see the others that started this creative process!
Don't you just love snowflakes?!? I do especially when they are snowflake kisses! There is nothing like being outside and all of a sudden snowflakes start falling from the sky and they fall on your face as you look up... snowflake kisses!
Project Details
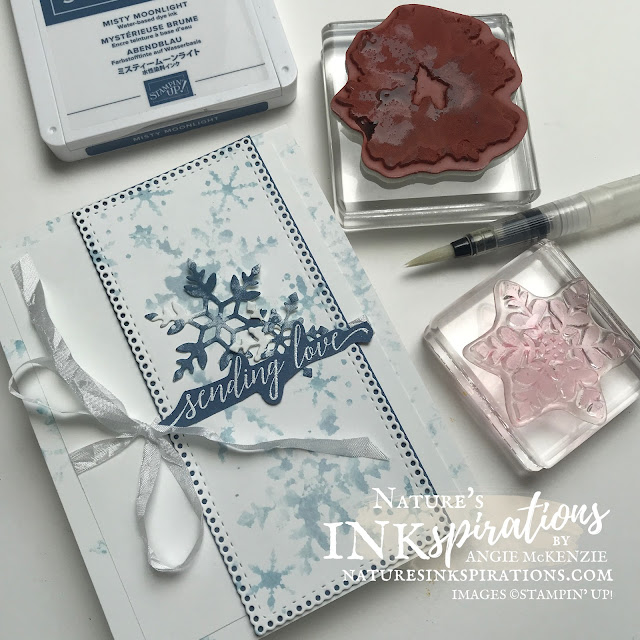
The Snowflake Wishes Stamp Set has some beautiful snowflakes to stamp! You can stamp them in any color and however you like and they will give you a watercolor look. There is also a coordinating die set, So Many Snowflakes, that has an amazing die-cut window die. That one die is what started my creative process for the group of cards that I created. I wanted to make the additional snowflake die-cuts which I added around the die-cut to resemble the stamped image. So I grabbed the Artistically Inked Stamp Set and inked the large bloom image three different times in Balmy Blue, Fresh Freesia and Misty Moonlight onto Basic White Cardstock.
The first images were the deepest colors and as I progressed, I noticed there was still color on the Water Painter so I just dabbed away with it on the rubber stamp and stamped away some more. The Heartfelt Wishes (SNEAK PEEK!) sentiment which was heat embossed on Misty Moonlight cardstock and then fussy cut was the perfect compliment to these wet snowflakes on the Ornate Layers die-cut panel.
I was able to stamp the main panel and the edges of the Thick Basic White card base with the original ink... I applied more ink to my Water Painter with a tad more ink from my Misty Moonlight ink lid to complete the inside stamping and, of course, the envelope!
More Inspiration
I hope you have been inspired by my project so you, too, can get ready for this year's Christmas season. Now it's time to continue along the blog hop to see what Annette and the others have created to inspire you. So click the next button below or look at the list below and continue along. You definitely don't want to miss any.
Roll Call
Angie McKenzie YOU ARE HERE
You Can Create This Card!
Here is What You'll Need to Get Started...
BASICS
- Clear Blocks B, C, D, H, I; Stamparatus; Small Grid Paper; Paper Trimmer; Stampin' Cut & Emboss Machine; Heat Tool; Water Painters; Multipurpose Liquid Glue; Bone Folder
STAMPS
- Snowflake Wishes Photopolymer Stamp Set, Artistically Inked Cling Stamp Set and Heartfelt Wishes Cling Stamp Set (SNEAK PEEK from the July-December 2021 Mini Catalog)
PAPER
- Basic White, Basic White Thick and Misty Moonlight Cardstocks; Basic White Medium Envelopes
INK
- Misty Moonlight Classic Stampin' Pad; VersaMark Ink
OTHER
- So Many Snowflakes Dies, Ornate Layers Dies, Basics Embossing Powders, White 1/4" Crinkled Seam Binding Ribbon
You can purchase any of these supplies from my online store if you live in the USA and do not already have a Stampin' Up!® demonstrator.
Time to Use Your Paper Trimmer!
PAPER CUTS:
- Basic White Thick - 4-1/4" x 11" and score at 5-1/2" (card base)
- Basic White Thick - 4-1/4" x 11" and score at 5-1/2" (card base)
- Basic White - 4" x 5-1/4" (x2); 2-1/2" x 5-1/2" (for stamping and diecutting)
- Basic White - 4" x 5-1/4" (x2); 2-1/2" x 5-1/2" (for stamping and diecutting)
- Misty Moonlight - 2-1/2" x 5-1/2" (for trimming down); scraps (for heat embossing)
- Misty Moonlight - 2-1/2" x 5-1/2" (for trimming down); scraps (for heat embossing)


Gorgeous elegant card
ReplyDeleteVery pretty, I love the colors.
ReplyDeleteBeautiful cardd
ReplyDeleteFabulous, great Technique
ReplyDeleteLovely card Angie and great technique x
ReplyDeleteFab rexhnique Angie! Love this card xx
ReplyDeleteA very lovely card, and I love the sentiments! Nice technique too!
ReplyDelete