 |
| A Blue Hydrangea for inspiration! |
Hello and welcome to my blog! Today I am hopping with the Casually Crafting Design Team! This month's theme is a Sketch Challenge so there are sure to be quite a few different interpretations from the sketch giving you lots of inspiration. There are several of us hopping today - you will find the list to follow along towards the bottom of my blog post - so sit back and enjoy your favorite coffee, tea, water or smoothie as we share some handmade projects with you!
Today's Project
Project Details
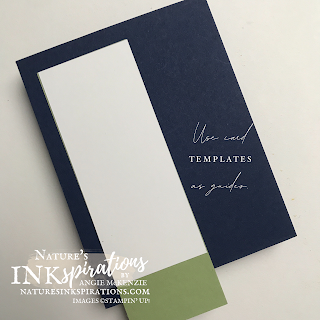
Create your card base by cutting a piece of Night of Navy Cardstock in half (vertically or horizontally) and turning it 90 degrees and scoring it down the middle. Fold the piece at the score line and burnish with a bone folder for a nice crisp, clean card base.
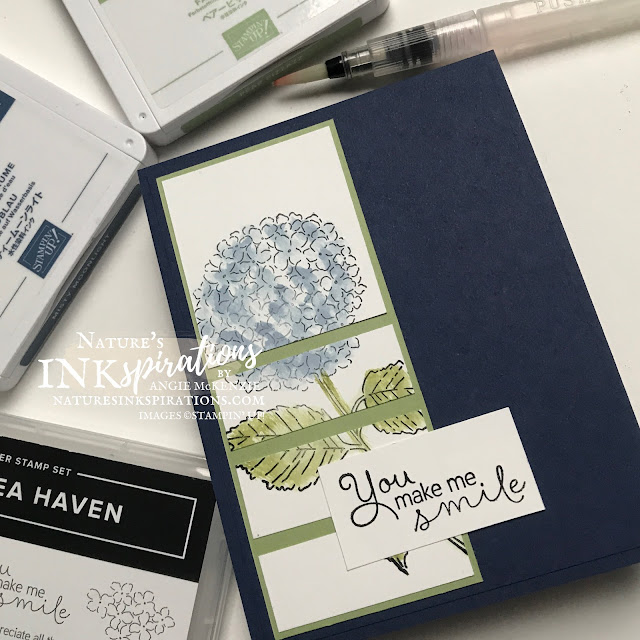
Stamp the large Hydrangea Haven image in Jet Black StazOn on Basic White cardstock. Color the blossom with a damp water painter and Misty Moonlight ink using the Classic Stampin' Pad lid as a paint palette. Dab/pounce the water painter with small, short strokes to fill in the hydrangea bloom. This application assists with color variations while making sure the brush remains damp. Clean the nib well with water and squeeze dry with a cloth (I use a microfiber cloth designated as my "stamping cloth"). Color the stem and leaves with the damp water painter and Pear Pizzazz ink.
Once the painted layer has dried, trim the lower half to three 2" x 3/4" strips and space apart before adhering to the Pear Pizzazz Cardstock layer with liquid glue. Adhere to the Night of Navy Cardstock layer. Stamp the sentiment in StazOn on the 1" x 2" Basic White layer and adhere to the layers. Adhere the stamped layers onto the Night of Navy card base.
The most important part of creating a handmade card is to remember to stamp the inside and the envelope! Replicate the card layers to compliment the card front. This layout called for an extra layer underneath the focal stamped layer so the surface would remain flat when corresponding to the recipient. Stamping the envelope front and the flap is a special touch that only handmade cards can convey to the recipient. **SMILE**
More Inspiration
I hope you have been inspired by my project and the colors. Now it's time to continue along the blog hop - you're currently with me, Angie McKenzie, at #7 - to get more inspiration from the others... so look at the list below and continue along. You definitely don't want to miss any.
You Can Make This Card Yourself!
What You'll Need to Get Started
BASIC SUPPLIES:
- Clear Blocks B, E, H; Stamparatus; Small Grid Paper; Paper Trimmer; Multipurpose Liquid Glue; and Water Painters
STAMPS:
- Hydrangea Haven Photopolymer Stamp Set
PAPER:
- Basic White, Pear Pizzazz and Night of Navy Cardstocks
INK:
- Jet Black StazOn Ink Pad; Pear Pizzazz and Misty Moonlight Classic Stampin' Pads
You can purchase any of these supplies from my online store if you live in the USA and do not already have a Stampin' Up!® demonstrator.
Time to Use Your Paper Trimmer!
PAPER CUTS:
- Night of Navy - 4-1/4" x 11" and score at 5-1/2" (card base); 4" x 5-1/4" (x2)
- Basic White - 2" x 5-1/4"; 3-1/2" x 4-3/4"; 1-3/4" x 4-3/4"; 1" x 2"; 1/2" scraps (for layering)
- Pear Pizzazz - 2-1/8" x 5-1/16" (x2)


Beautiful card Angie & so glad you enjoyed playing with my 'skinny' sketch LOL xx
ReplyDeleteGorgeous Angie. I just love this stamp set and it is beautiful in this lay out
ReplyDeletePretty card,thank you for sharing! x Ann Alexander
ReplyDeleteVery pretty!
ReplyDeleteSo Pretty!
ReplyDelete