Hello and welcome to the Around the World on Wednesday Blog Hop! We are glad you have joined us and look forward to spending time with you as we CAS(e) the Team Member following us in the line-up! So sit back and enjoy your favorite cuppa as you enjoy your trip Around the World on Wednesday!
TODAY'S PROJECT
I have the pleasure of sharing inspiration from the lovely Wendy Lee! Four years ago, before I became a Stampin' Up! Demonstrator, Wendy was one of those stampers that I followed everyday it seemed as her projects always inspired me and made me SMILE! You know how much I love to smile!!! Her smile is contagious and her projects are so amazing. In fact, she is on a Pinterest board of mine. **SMILE**
At my first OnStage in Orlando for the 30th Anniversary celebration of Stampin' Up!, Wendy Lee was one of the handful of stampers that I got to meet in person! I'm blessed to know Wendy through a tutorial group that I'm in, thus I was thrilled to have spotted her as she had forewarned us of her lovely hair color change!
It was so to hard to pick just one project of hers to CAS(e)... but I finally decided on her Masked Wild Rose card!
This lovely creation has been a favorite ever since I first saw it a year and a half ago. So my style, but the challenge of masking is what caught my attention along with the vibrant colors!
 |
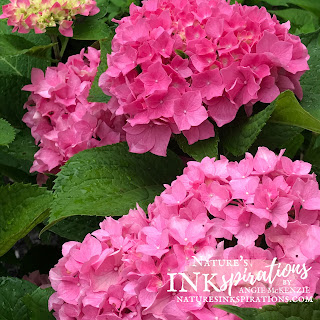
| June 27, 2021 - Pink Hydrangeas |
 |
| Happy Wednesday, y'all! I love my hydrangeas! - July 14, 2021 |
PROJECT DETAILS
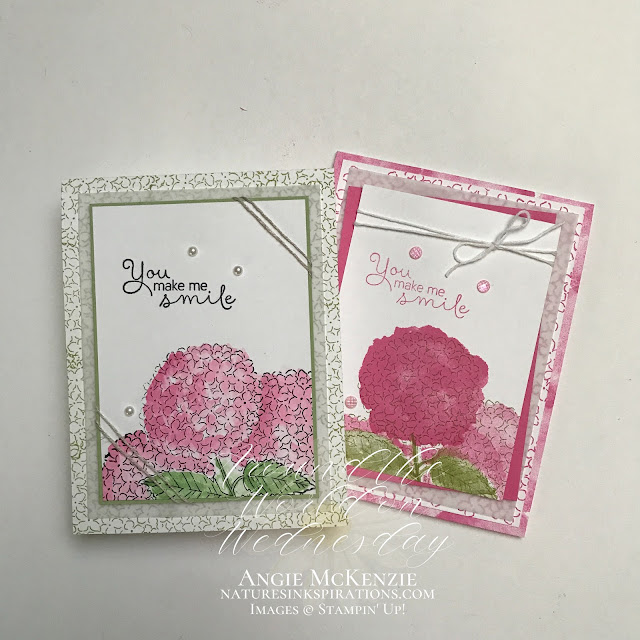
The large hydrangea image from Hydrangea Haven was the masked image for my focal point. The image was stamped on Basic White cardstock and again on a post-it note to create the mask.
Did you notice the blooms look different on both cards?!?
The Pear Pizzazz card has hydrangeas stamped with StazOn ink and damp watercolored with Polished Pink ink by pouncing the tip of the Medium Tip Water Painter. Applying the color this way mimics the natural color variances in the hydrangea blooms while not saturating the Basic White cardstock layer. The Polished Pink card has hydrangeas stamped with Pear Pizzazz with the coordinating bloom fill image stamped with Polished Pink ink. The color variance is part of the photopolymer stamp image, pretty cool don't you think? The lighter blooms were stamped off (the image was inked and stamped on scrap paper before stamped on the cardstock) aka Generation Stamping.
 |
| Stamping on the cardfront with the large bloom image. |
The damp watercolored blooms were adhered to a Pear Pizzazz cardstock layer to compliment the Pear Pizzazz stamping on the Basic White Thick cardstock base. It wasn't until I was watermarking the pictures that I realized I forgot the embellishments. Pearls and Blends colored Elegant Faceted Gems were added just in the knick of time! **wink**
 |
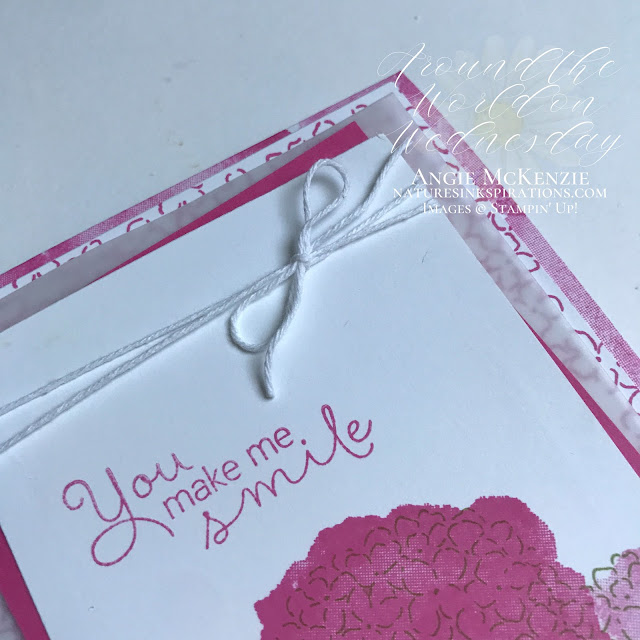
| The additional layer, twist and full across twine wrap were my personal touches used to stretch the original card design to new limits. |
If you look closely at the above picture, you will notice an additional layer behind the vellum. This additional layer was stamped with the small "corner" bloom image in Polished Pink ink multiple times. The Basic White Thick cardstock base was going to remain until I had an "ah-haaaa" moment and off-stamped the large bloom fill image around the entire cardfront base.
The stamping and layers were replicated on the insides of each card. The envelope fronts and flaps were also stamped to give the recipients sneak peeks to the inside.
THE AWOW TEAM
THIS IS US
We are such a diverse and fun group of stampers from all over the world! Twenty three (23) of my Stampin' Up! Demonstrator friends are joining me today in this worldwide hug that stretches all the way from New Zealand to Hawaii across twelve different time zones. We love sharing sunshine with you through projects from our individual parts of the world on these second Wednesdays of the month. I hope that you are being filled with lots of inspiration.
MORE INSPIRATION
I hope this Wendy Lee Inspired project has helped you imagine different ways you can create cards that inspire you with adding your own special touches. Now, hop along with me, Angie McKenzie, to see more Wednesday inspirations from my amazing friends Around the World. Just click the daisy below to go to my friend, Wendy, as she shares her awesome CAS(e)d project, or scroll down the name list to follow along because you sure don't want to miss any.
You Can Make These Yourself!
What You'll Need to Get Started
BASIC SUPPLIES:
- Clear Blocks B, D, H; Stamparatus; Small Grid Paper; StazOn Cleaner; Stampin' Mist; Stampin' Scrub; Paper Trimmer; Paper Snips; Multipurpose Liquid Glue; Tear & Tape Adhesive and Water Painters
STAMPS:
- Hydrangea Haven Photopolymer Stamp Set
PAPER:
- Basic White, Basic White Thick, Vellum, Pear Pizzazz, and Polished Pink Cardstocks; Basic White Medium Envelopes
INK:
- Pear Pizzazz and Polished Pink Classic Stampin' Pads, Tuxedo Black Memento Ink Pad and Jet Black StazOn Ink Pad; Polished Pink Stampin' Blends Combo Pack
OTHER:
- Linen Thread, Baker's Twine Essentials Pack, Elegant Faceted Gems, Pearl Basic Jewels
You can purchase any of these supplies from my online store if you live in the USA and do not already have a Stampin' Up!® demonstrator.
Time to Use Your Paper Trimmer!
PAPER CUTS for the Watercolor Card:
- Basic White Thick - 4-1/4" x 11" and score at 5-1/2" (card base)
- Vellum - 3-3/4" x 5" (x2)
- Pear Pizzazz - 3-3/16" x 4-5/16" (x2); 3-1/8" x 4-1/4" (x2)
- Basic White - 3-1/4" x 4-1/2" (x2)
PAPER CUTS for Faux Watercolor Card:
- Basic White Thick - 4-1/4" x 11" and score at 5-1/2" (card base)
- Vellum - 3-3/4" x 5" (x3)
- Polished Pink - 3-3/16" x 4-5/16" (x3); 3-1/8" x 4-1/4" (x3)
- Basic White - 3-1/4" x 4-1/2" (x3); 4" x 5-1/4" (for the front); 4" x 5-1/16" (x2) (for the inside)


Beautiful project Angie! Thank you so much for all your kind words my friend. Can't wait to see you again.
ReplyDeleteSo beautiful Angie! I love Wendy's Rose, and I adore your Hydrangeas! xx
ReplyDeleteWauw! So stunning!
ReplyDeleteI love the way this favorite sketch works with hydrangeas! We had hydrangeas all over at our "old" place. They were so easy to establish and even look lovely when past their bloom
ReplyDeleteBoth cards are just beautiful!!
ReplyDeleteBeautiful cards! Love the layout and the beautiful coloring!
ReplyDeleteWhat super cards! One of the delights of this hop has been seeing the original along side the CASE and admiring what's the same and what's changed.
ReplyDeleteHuge work on today's project. I love that you think about explaining your designs in detail. Thank you for sharing !
ReplyDeleteLove these! Hydrangeas are one of my favorites and they work so well with this CAS(e).
ReplyDeleteOh these are just so beautiful. You make me want to ink up my Hydrangea stamp set x
ReplyDelete