Happy Saturday and welcome to my blog! Today I am hopping along the Ink.Stamp.Share Monthly Blog Hop as we share projects which have caught our eye in the Annual Catalog and recreate them with our own touch of creativity. We hope that we inspire you to create along with us. There are several of us hopping today - you will find the list to follow along towards the bottom of my blog post - so sit back and enjoy your favorite coffee, tea, water or smoothie as we share some handmade projects with you!
Today's Project
 |
| Faux Torn Paper Technique 2021-2022 Annual Catalog, page 26 |
 |
| Designed for an OhMi INKspirations Team Shoebox Swap |
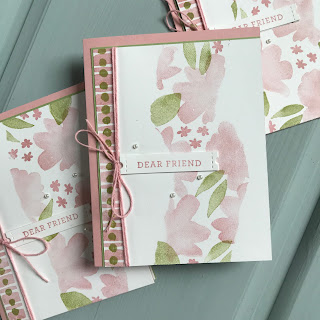
This card was designed for my upline's team meeting this past Monday where we enjoyed doing a shoebox swap where we each made up seven (7) kits to share. Always loving to share techniques for these events, sharing the Faux Torn Paper Technique was perfect especially since the design used almost all of the stamped images for the stamp set. And simple stamping had not been my focus, all but one of the images would have been used! **WINK**
 |
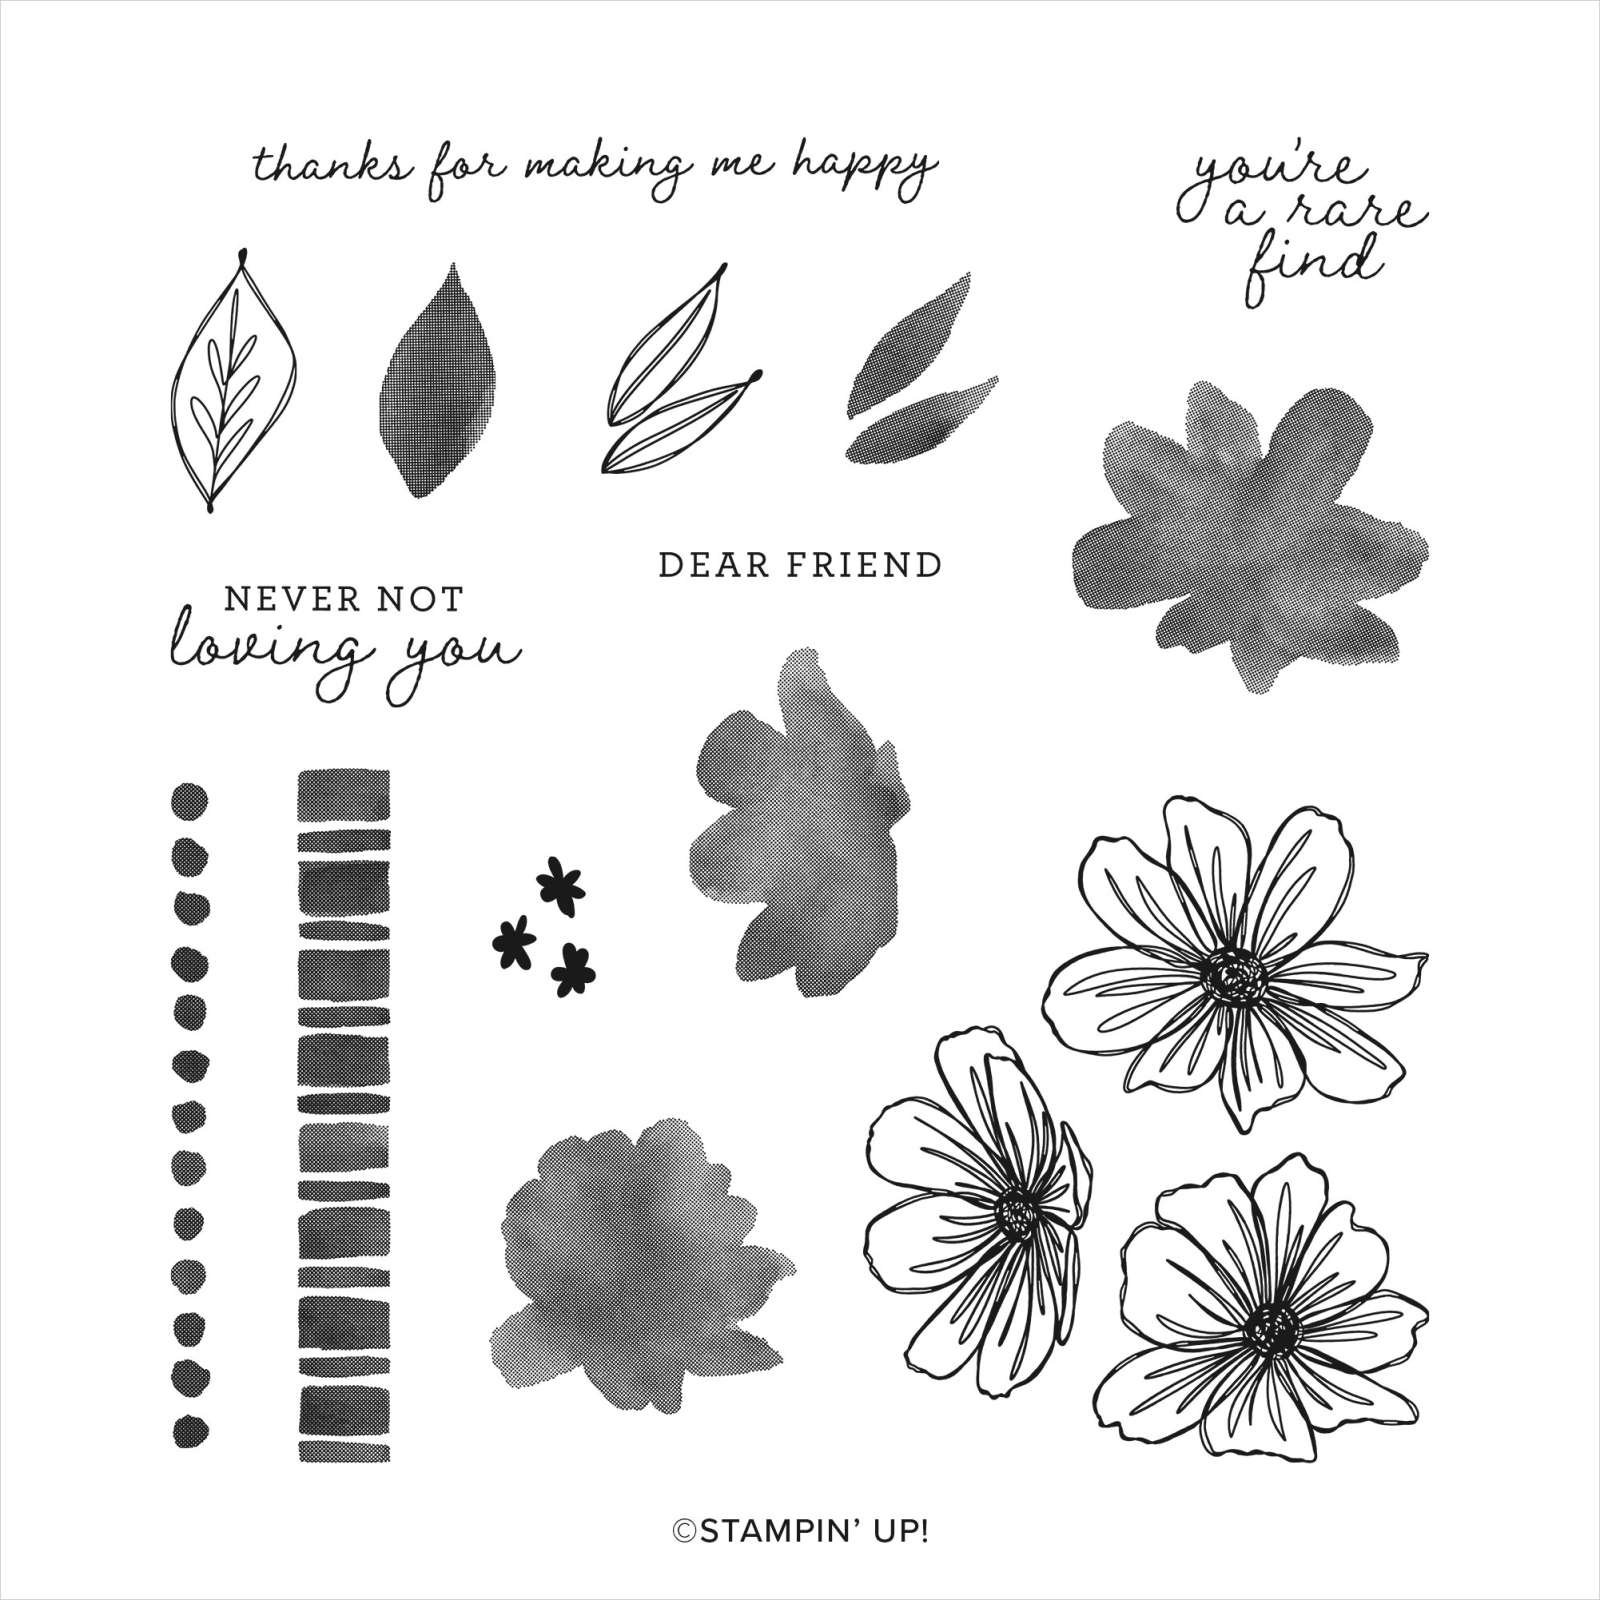
| 12 of the 16 images were used for today's project! |
Project Details
Starting with the fun part of the card, a 3" x 5-1/2" piece of grid paper from my stash was torn down the middle creating curves where I wished. The two pieces were placed over a 4" x 5-1/4" piece of Basic White Cardstock eyeballing the width that I wished to stamp within.
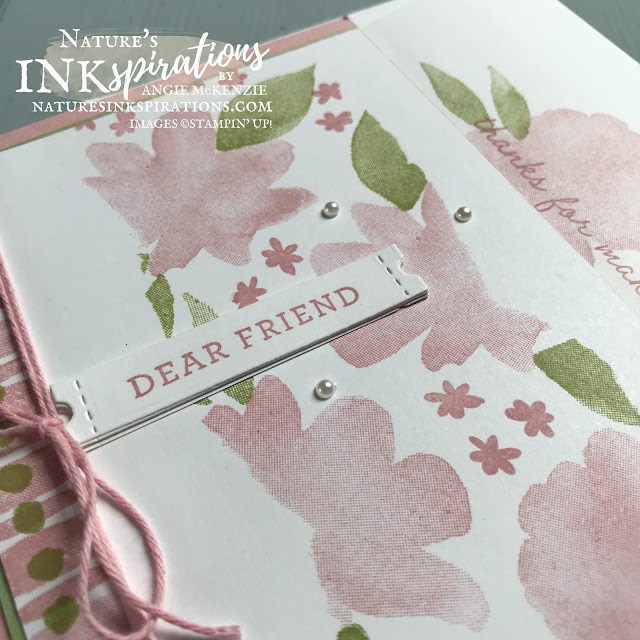
The three floral fill images were stamped in Blushing Bride ink randomly down the space being sure to stamp the images off the edge to create the faux edge. The two leaf fill images were stamped in Pear Pizzazz ink. The small multiple floral image was stamped in Blushing Bride ink to fill any major white spaces. Remove the torn grid paper and viola! A one of a kind custom card front is created. Stamp the large line image in Blushing Bride ink along the left edge of the card layer. Stamp the dotted line image in Pear Pizzazz ink over the stamped lines. Wrap the Blushing Bride Snail Mail Twine around the stamped card layer twice tying it off with a bow. Die-cut the wide sentiment label three times. Cut two of the die-cuts in half trimming along the edge to replicate the die cut edge. Stamp the sentiment aligning it between the two indentations. Stack and adhere the smaller die cuts. Adjust the twine as needed before adhering to the 4-1/16" x 5-5/16" Pear Pizzazz Cardstock layer aligning along the right and bottom edges. Adhere to the Blushing Bride standard card base aligning along the right and bottom edges. Embellish with Basic Pearl Jewels.
The inside is just as important as the front of a card so the layers and stamping were replicated to compliment the card front. The sentiment was stamped in Blushing Bride onto the third die-cut label and adhere over the stamped floral and leaf images. The envelope was similarly stamped on the front and the flap for a sneak peak of what's inside for the recipient.
You Can Make This
Here's What You'll Need to Get Started
BASIC SUPPLIES:
- Paper Trimmer
- Mini Cut & Emboss Machine
- Stamparatus
- Small Grid Paper
- Paper Snips
- Clear Blocks A, B, C, D, G, H
- Multipurpose Liquid Glue
- Simply Shammy
- Standard Stamp Cases
- Bone Folder
STAMPS:
- Art in Bloom Photopolymer Stamp Set (included in the Art in Bloom Bundle with the Bloom Hybrid Embossing Folder and Bloom Dies for a Bundled Savings of 10%)
INK:
- Blushing Bride Classic Stampin' Pad
- Pear Pizzazz Classic Stampin' Pad
PAPER:
- Basic White Cardstock
- Blushing Bride Cardstock
- Pear Pizzazz Cardstock
- Basic White Medium Envelopes
OTHER:
- Bloom Dies (included in the Art in Bloom Bundle with the Art in Bloom Stamp Set and the Bloom Hybrid Embossing Folder for a Bundled Savings of 10%)
- Pearl Basic Jewels
- Snail Mail Twine Combo Pack (while supplies last or June 30, 2021)
You can purchase any of these supplies from my online store if you live in the USA and do not have a Stampin' Up!® demonstrator.
More Inspiration
I hope you have been inspired by my project inspired by the work done by concept artists in the 2021-2022 Annual Catalog. Now it's time to continue along the blog hop to see what Kim and the others have created to inspire you. So click the next button below or look at the list below and continue along. You definitely don't want to miss any.
Roll Call
Angie McKenzie YOU ARE HERE


Gorgeous card, lovely colours.x
ReplyDeleteLove the twist on this.........
ReplyDeleteLovely card
ReplyDeleteGorgeous Card, such soft and pretty colours x
ReplyDeleteLovely card x
ReplyDeleteThat is a great card, love the colors.
ReplyDeleteI love your beautiful card and I know your team would have loved it for the Shoebox Swap!
ReplyDeleteStunning x
ReplyDeleteBeautiful card, Love your colour choice
ReplyDeleteLovely seeing everyones inspiration and Interpretation
Thanks for sharing
Such a pretty take on the inspiration card. thanks for sharing
ReplyDeleteBeautiful cards and a lovely technique Angie :-)
ReplyDelete