Happy Sunday! Hello and welcome to my blog. Today I am hopping with some Crafty Collaborators along the Share it Sunday Blog Hop and the theme is share a project, any project. There are several of us hopping today - you will find the list to follow along towards the bottom of my blog post - so sit back and enjoy your favorite coffee, tea, water or smoothie as we share some handmade projects with you!
Today's Projects
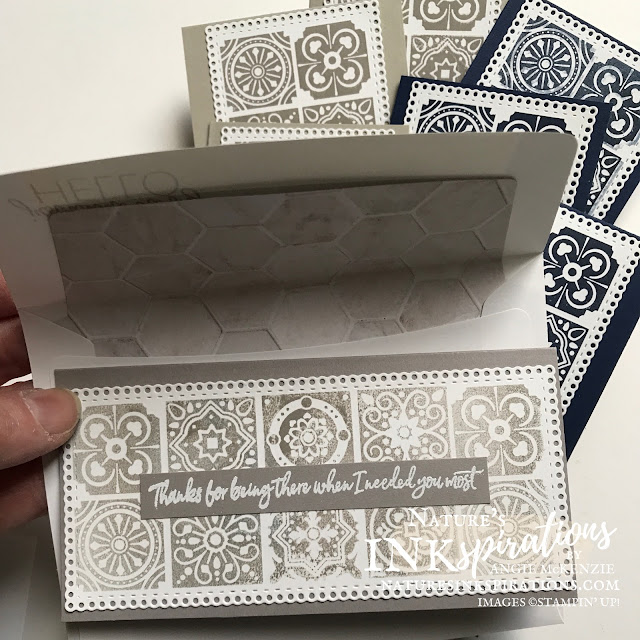
It's the last day of April can you believe it?!?! I've been busy making some mini slim line cards as they are such a fun card to share... and you can get THREE card bases from one sheet of 8-1/2" x 11" cardstock! Cut the cardstock to 5-1/2" x 11" and then to two 5-1/2" squares. Fold them in half and viola, you have two cardbases (2-3/4" x 5-1/2"). Score the remaining piece at 5-1/2" and you have the third cardbase (3" x 5-1/2")
Project Details
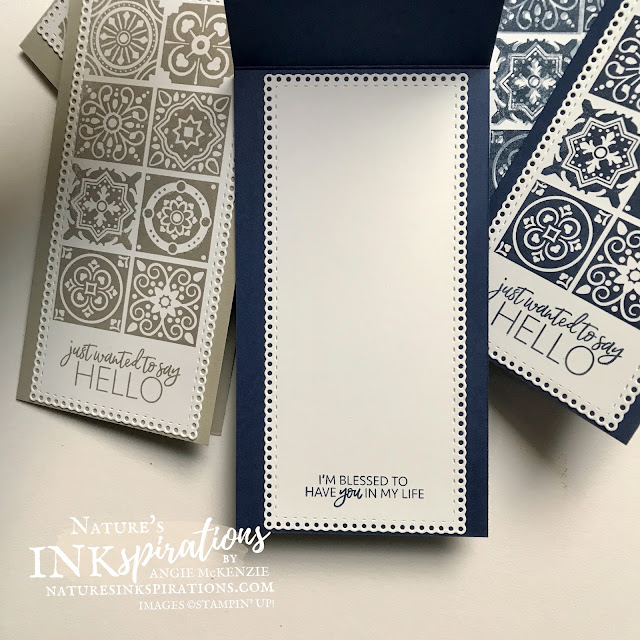
Die cut multiple Ornate Layer Dies and have them ready for stamping in the Stamparatus. Die cut one so you have enough edging around it to hold with your magnet. You can die cut SIX panels per sheet of Basic White cardstock. It's amazing doing it this way. It is such a paper and time saver.
Line up your image on the negative opening on your Stamparatus after stamping the image on the Small Grid Paper. Hold it down with your magnet(s) and then add all the die cuts one at a time to stamp away for your multiples.
The horizontal card was created with off-stamping, hinge stamping and masking. You move the Stamparatus down (when the image is stamped vertically as I did) to stamp the fifth row. TIP: Use wide masking tape to cover the tiles that you don't wish ink and then removing the tape before stamping. This design is my favorite, but it is the most time consuming; thus, why I only stamped one! This design also called for a white heat embossed sentiment.
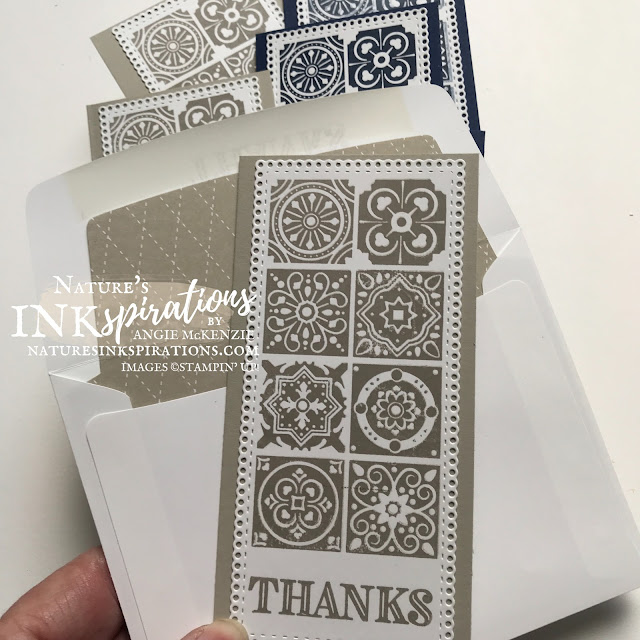
With stamping the four tiles, there is plenty of room for the perfect sentiment of your choice... I chose sentiments from the Today's Tiles and Ornate Thanks Stamp Sets.
And we mustn't forget the insides! The panel was perfect for the inside, too. Along with a simple sentiment expressing your gratitude to the recipient. You can also fussy cut some of the tiles to add to the inside.
And you know, I always have to finish off my envelopes, too. Stamping the sentiments on the front and on the envelope flap as the tiles were just a bit too complicated with the Stamparatus. Lining the envelopes with coordinating Designer Series Paper is always my favorite finishing touch... I love my retired dies for this purpose as the die fits perfectly on a 6" x 6" piece of DSP with minimal scraps! And if you don't have the dies, it is easy to do by trimming along the edge of the envelope flap and free handing the angle of the inside... trim off about a 1/4" of the bottom and it should fit perfectly inside your envelope.
You Can Make These Mini Slim Cards and Here's What You'll Need to Get Started
BASIC SUPPLIES:
- Clear Block C, G
- Paper Trimmer
- Mini Cut & Emboss Machine
- Stamparatus
- Small Grid Paper
- Heat Tool
- White Stampin' Emboss Powder
- Multipurpose Liquid Glue
- Bone Folder
- Simply Shammy
- Stampin' Mist
- Stampin' Scrub
STAMPS:
- Today's Tiles Photopolymer Stamp Set (**retiring May 3, 2021)
- Ornate Thanks Photopolymer Stamp Set
INK:
- Gray Granite Classic Stampin' Pad
- Night of Navy Classic Stampin' Pad
PAPER:
- Basic White cardstock
- Gray Granite cardstock
- Sahara Sand cardstock
- Neutrals 6" x 6" Designer Series Paper
- In Good Taste Designer Series Paper
- Basic White Medium envelope
OTHER:
- Ornate Layers Dies
- Envelope Liners Framelits Dies (retired)
You can purchase any of these supplies from my online store if you do not already have a Stampin' Up!® demonstrator.
More Inspiration
I hope you have been inspired by my projects to create some of your own so you can make someone's day by letting them know you care. Now it's time to continue along the blog hop - you're currently with me, Angie McKenzie, at #22 - to get more inspiration from the others... so look at the list below and continue along. You definitely don't want to miss any.


Beautiful cards❤️
ReplyDeleteLove your cards!
ReplyDeleteWhat a fabulous idea. Love your cards!
ReplyDeleteSuch a fabulous project x
ReplyDeleteGreat idea for cards for guys!
ReplyDeleteLove these. I hadn't seen a mini-slimline card before. Now, I have to try it!
ReplyDeleteLove these sweet cards Angie x
ReplyDelete