Hello and welcome to my blog! Today I am hopping along with other members of Bruno and Kylie Bertucci's Stampin' Up!® Demonstrator Training Program. I have learned so much through this training group since I first became a demonstrator that I had to participate in it once again. We love doing our Monthly Team Blog Hops with our general theme for all the hops being customer and team thank you cards.
Today's Project
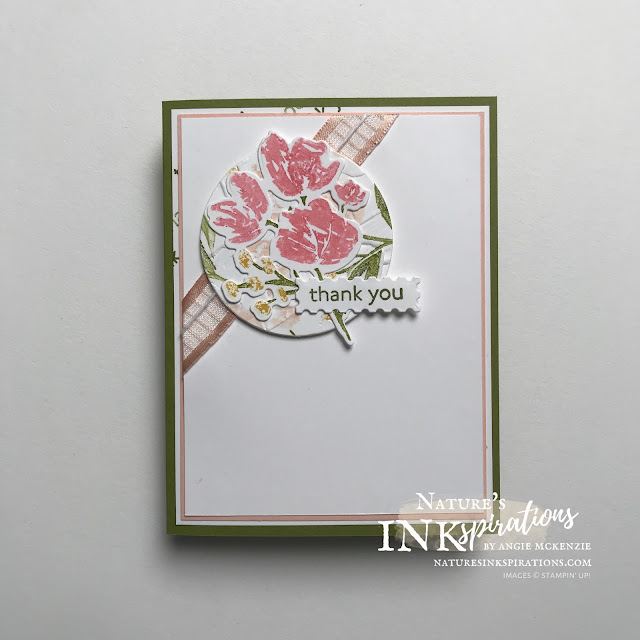
Earlier today I was browsing through my e-mails and was intrigued by the sketch that fellow demonstrator Brian King used for his colorful card. The sketch was from Freshly Made Sketches and designed by fellow demonstrator, Linda Callahan. I chose not to participate in the challenge due to timing, but it did not stop me from using it as the source of inspiration for my customer thank you cards this month!
Project Details
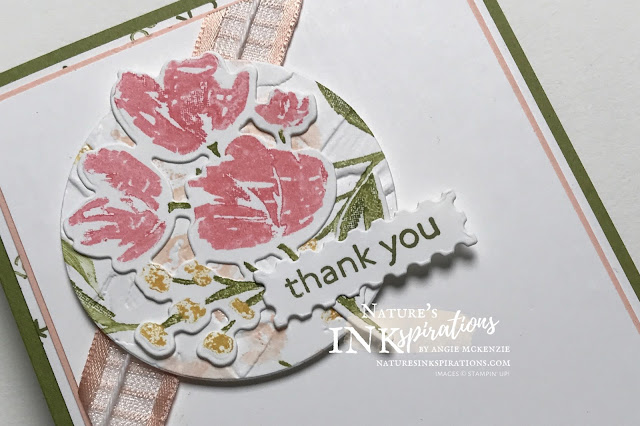
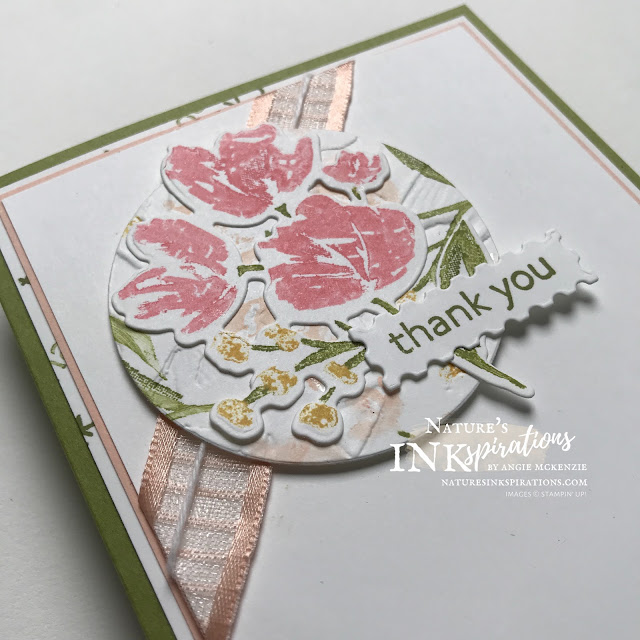
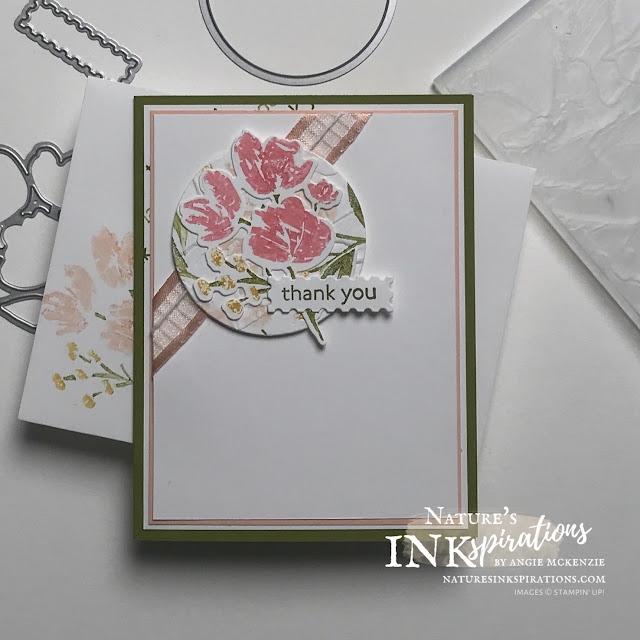
The Art Gallery floral cluster was colored with Stampin' Write Markers using Old Olive for the leaves and stems, Bumblebee for the smallest blooms and Flirty Flamingo for the larger blooms and stamped onto Basic White cardstock. The stamped image was die cut with the coordinating Floral Gallery die and set aside. The floral image was cleaned with a Simply Shammy and colored with Old Olive, Bumblebee and Petal Pink several times on a Basic White die cut circle from the Layering Circles Dies. The stamped circle was embossed with the Painted Texture 3D Embossing Folder.
The Petal Pink 5/8" Organdy Ribbon was adhered to a Basic White cardstock layer and adhered to the back with Tear & Tape Adhesive. White twine was wrapped along the center of ribbon and adhered similarly. The Basic White card layer was layered with Petal Pink and Basic White card layers before being adhered to the Old Olive vertical card base. The bottom Basic White card layer replicates the three diagonal lines with the sentiment inked in Old Olive and stamped and off-stamped. The sentiment panel was also stamped and die cut from this same layer.
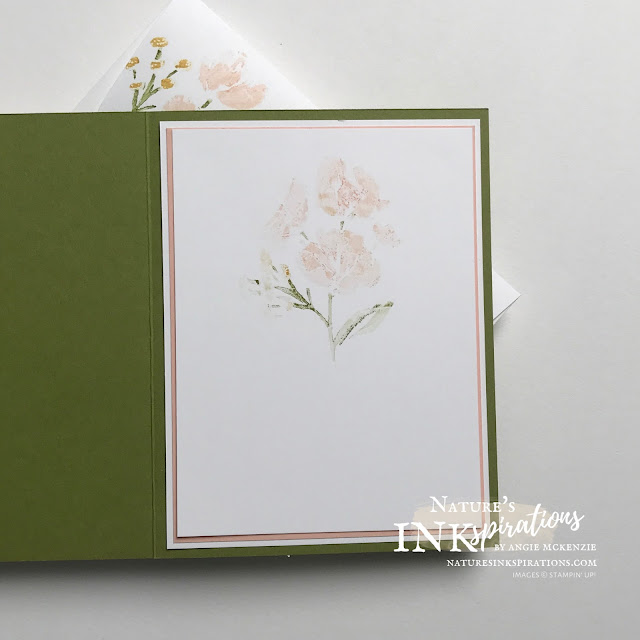
The inside of the card is just as important as the card front! The layers were replicated along with the stamped cluster image which was off-stamped. The same image was also colored and stamped on the envelope front and flap!
You Can Make This!
Here's What You'll Need to Get Started
BASIC SUPPLIES:
- Clear Blocks D, G
- Paper Trimmer
- Stampin' Cut & Emboss Machine
- Paper Snips
- Multipurpose Liquid Glue
- Tear & Tape Adhesive
- Stampin' Dimensionals
- Grid Paper
- Stampin' Pierce Mat
- Bone Folder
STAMPS:
- Art Gallery Photopolymer Stamp Set**
INK:
- Old Olive Classic Stampin' Pad
- Brights Stampin' Write Markers
- Subtles Stampin' Write Markers
- Regals Stampin' Write Markers
- 2020-2022 In Color Stampin' Write Markers
PAPER:
- Basic White cardstock
- Petal Pink cardstock
- Old Olive cardstock
- Basic White Medium envelope
OTHER:
- Floral Gallery Dies**
- Layering Circles Dies
- Painted Texture 3D Embossing Folder
- Petal Pink 5/8" Organdy Striped Ribbon
- Snail Mail Twine Combo Pack
**Purchase the Art Gallery Bundle for added Bundled Savings when purchasing the Art Gallery Stamp Set and the Floral Gallery Dies together.
You can purchase any of these supplies from my online store if you do not have a Stampin' Up!® demonstrator. Card challenges can be great inspiration sources! Should you not wish to participate in the challenge, you should still link to the challenge so others know the source of your inspiration.



Pretty inside and out. Thank you Angie for taking part in our Demonstrator Training Blog Hop this month.
ReplyDeleteThanks so much, Kylie. It's always a pleasure to hop with the team. x
DeleteI love the design of your card - so pretty. And I'm a huge fan of completing the inside of the card - I really like how you stamped off first - it will serve as a subtle, yet very pretty background for a message.
ReplyDeleteThanks so much, Mary Ann! Totally inspired by the card challenge. Coloring with markers was one of the first techniques I learned as a stamper so I love using it whenever I get the change like with this amazing stamp. So glad you like completed insides, too!
DeleteBeautiful card Angie, love it!😊❤️
ReplyDeleteThanks so much, Annie! x
DeleteGreat card Angie, such an unusual layout x
ReplyDeleteThanks so much, Mo! Nothing like a card sketch for inspiration. x
DeleteLovely design. Pretty card. Thank you for sharing
ReplyDeleteThanks so much, Sandie.
DeleteBeautiful card I love the background stamping on the circle, adds so much dimension
ReplyDeleteThank you, Lesley! I loved coloring the stamp with my markers for creating that background so much - truly relaxing way to stamp.
DeleteSuch a pretty card and I love your colour combo x
ReplyDeleteThanks so much, Sara. It's definitely a favorite color combo of mine. x
Delete