Hello and welcome to my blog! Today is my first time to be hopping with the Casually Crafting Design Team! This is such a talented group of team members that will be providing inspiration every third Saturday of the month. This month's theme is "anything goes" so there is sure to be lots of inspiration for everyone. There are several of us hopping today - you will find the list to follow along towards the bottom of my blog post - so sit back and enjoy your favorite coffee, tea, water or smoothie as we share some handmade projects with you!
Today's Project
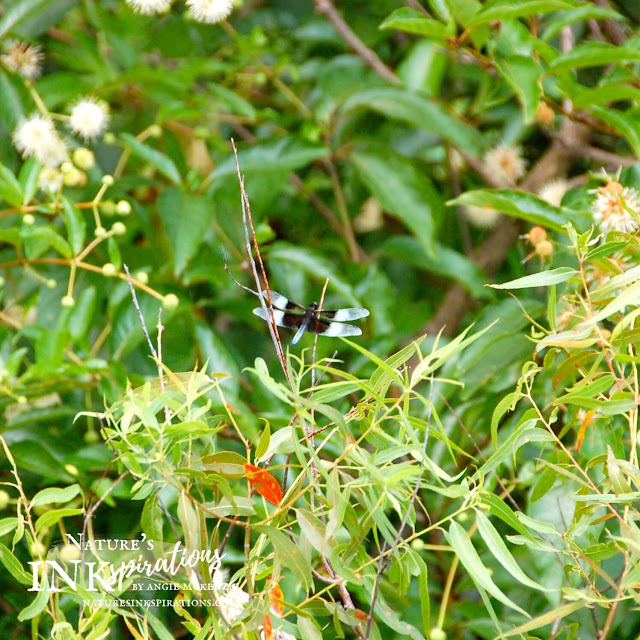
Memories from a summer vacation years ago in Michigan along Big Lake surrounded by dragonflies... inspired today's project. Lots of much needed relaxation was needed that summer 11 years ago and finally after going through 600+ pictures, I found the picture that captured a moment of the numerous memories of these beautiful winged insects.
Project Details
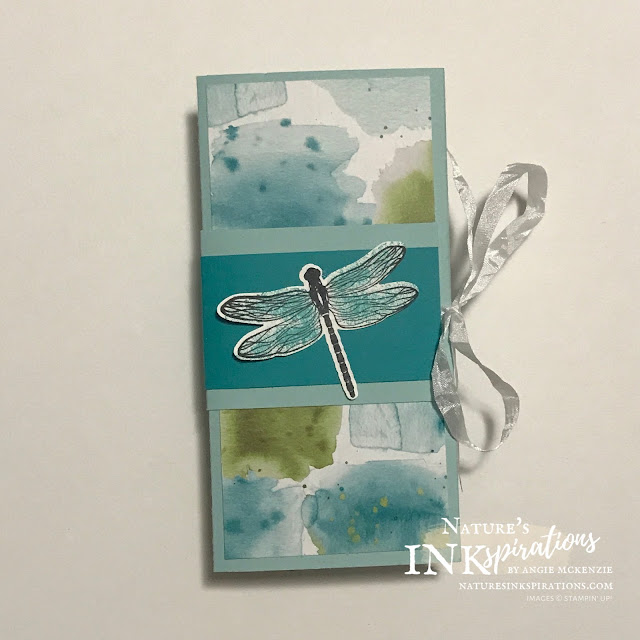
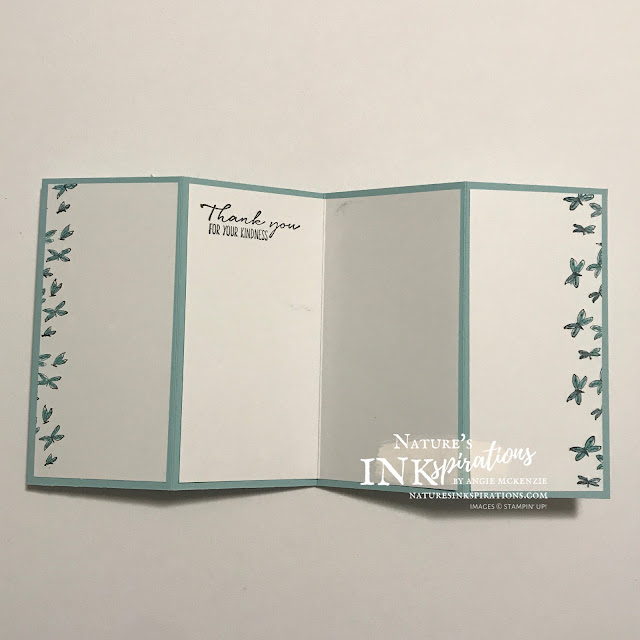
The delicacy of these winged beauties called for a delicate card... which I'll just call a mini slim double fold. The Pool Party 5-1/2" x 11" cardbase is scored at 5-1/2", flipped over and scored at 2-3/4" on each side. The Ice Cream Corner DSP (representing the reflections of the lake water) was cut to 2-1/2" x 5-1/4" (x2) and adhered to the front and the back.
For the main inside where the message is written, the outer layers were stamped with the smaller winged image along the outside edges. The wings were quickly filled with the Light Bermuda Bay Stampin' Blends Marker. The sentiment was inked in Memento and stamped in the upper left corner allowing for plenty of room for corresponding to the recipient.
Pool Party and Bermuda Bay cardstock strips (2" and 1-1/2" wide strips) were aligned and self folded along the edge of the cardbase trimming to fit the back edge of the cardbase after wrapping a lengthy piece of Whisper White Crinkled Seam Binding Ribbon. The ribbon was tied off in a bow to close the cardbase. The stamped and punched dragonfly was adhered to the card panel with liquid glue along the center leaving the wings to flutter.
The envelope was lined with the DSP using a retired die. You can use paper snips to trim the top edge of a 5-3/4" x 5-1/2" piece of the DSP by aligning the envelope flap along the top of the longest side of the DSP. Insert the DSP and trim the bottom, if needed, before adhering the liner to the inside flap. The outside flap and front of the envelope were stamped to to compliment the card front.
You Can Make This
Here's What You'll Need to Get Started
BASIC SUPPLIES:
- Paper Trimmer
- Paper Snips
- Clear Block C, D, I
- Multipurpose Liquid Glue
- Small Grid Paper
- Bone Folder
- Stampin' Mist
- Stampin' Scrub
STAMPS:
- Dragonfly Garden Cling Stamp Set**
INK:
- Tuxedo Black Memento Ink Pad
- Bermuda Bay Classic Stampin' Pad
- Old Olive Stampin' Blends Combo Pack
- Bermuda Bay Stampin' Blends Combo Pack
- Daffodil Delight Stampin' Blends Combo Pack
PAPER:
- Basic White cardstock
- Bermuda Bay cardstock
- Pool Party cardstock
- Ice Cream Corner Designer Series Paper
- Basic White Medium envelope
OTHER:
- Dragonflies Punch**
- Whisper White 1/4" Crinkled Seam Binding Ribbon
**The Dragonfly Garden Bundle is available to purchase for bundled savings (includes the Dragonfly Garden Stamp Set and the Dragonflies Punch).
More Inspiration
I hope you have been inspired by my project to create something so you, too, can make someone's day by letting them know you care. Now it's time to continue along the blog hop - you're currently with me, Angie McKenzie, at #17 - to get more inspiration from the others... so look at the list below and continue along. You definitely don't want to miss any.


Great project, love it
ReplyDeleteThanks so much!
DeleteWow! I love this project and all the design elements included. Thanks for sharing and hopping with us today xx
ReplyDeleteThanks so much, Sara, I appreciate it. It's so lovely to be hopping with you and the team! xx
DeleteAnother stunner Angie! I would have been happy with just the outside but you had another couple of surprises for us! Gorgeous! :)
ReplyDeleteThanks so much for your kind thoughts, Deb! You made my day. x
DeleteWhat a fantastic fun fold, love this!
ReplyDeleteThanks so much, Annie! It was a lot of fun to create! :)
DeleteWhat a fun fold! I'll have to try this!
ReplyDeleteThanks, Melva! Can't wait to see what you create with it! :)
Deletelove your card and your inspiration
ReplyDeleteThanks so much, Michele!
DeleteHi Angie, thank you for sharing this beautiful card.
ReplyDeleteHi Susan! It was my pleasure and I hope it inspired you, too.
DeleteA fabulous fun fold card. Thanks for sharing.
ReplyDeleteThanks so much, Heather. It was my pleasure.
DeleteLove the card shape on this and the colors. How fun it was inspired by your picture too! Lovely work, Angie. Saw this on SCS and had to come see more of it!
ReplyDeleteThanks so much for popping by, Nancy! So many of my cards are inspired by pictures that I've taken. Nothing like drawing inspiration from nature. x
Delete