Thanks for visiting the March 2020 edition of the Third Thursdays Blog Hop! Are you as ready for Spring as I am?!? Well, Happy First Day of Spring, y'all!!! Here in NW Ohio, it is definitely here because... the grass is getting greener, the birds are singing, our residents ducks are courting again on the pond and my eyes are itching! So sit back and enjoy the inspirations on today's blog hop as we celebrate that Spring Has Sprung!!!
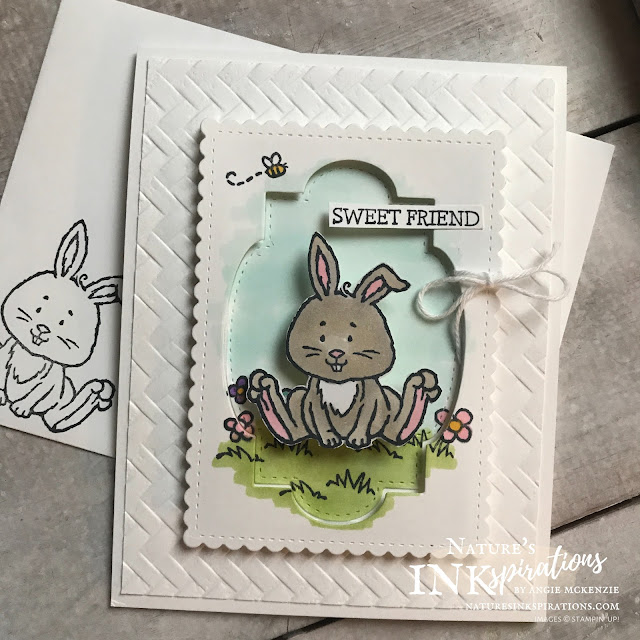
I am so enamored by this little bunny from the Welcome Easter stamp set! There is nothing like seeing the rabbits hopping around on our property to make me smile from ear to ear. So with Easter just around the corner and the Easter Bunny coming to visit children of all ages, I couldn't resist turning this little cutie into a hopper on a spring! **wink**
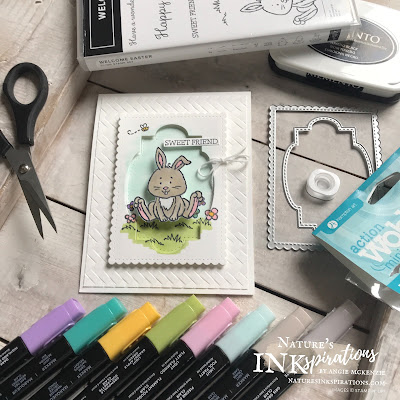
Stamp the bunny image in Tuxedo Black Memento ink onto Whisper White cardstock. Color with Light Smoky Slate and Light Smoky Slate Stampin' Blends Markers. Highlight the ears and feet with a Light Flirty Flamingo Stampin' Blends Marker. Fussy cut and set aside.
Emboss a 4 x 5-1/4" piece of Whisper White with the Coastal Weave 3D Embossing Folder and adhere to the front of a Thick Whisper White vertical folding card base with liquid adhesive. Using the largest scalloped die from the Stitched So Sweetly Dies, die cut it twice with Whisper White. Using the same die with the largest stitched label die, center the later and die cut on Whisper White. Stack one scallop die cut with the scallop/label die cuts together, stamp your scene in Memento ink placing and removing your bunny whenever needed. Color with Blends of your choice (I used Granny Apple Green for the grass; Dark Daffodil Delight for the flower centers and bee; Light Pool Party for the sky).
Adhere the colored label to the solid scalloped die cut with liquid glue so you have wiggle room for perfect alignment in the opening. Cut a piece of Whisper White Baker's Twine, wrap it around the opening and tie off in a bow as shown. Adhere the colored scalloped die cut to the bottom one with Foam Adhesive Strips. Adhere the bunny to a mini wobbler (which I purchased on Amazon) and watch him go! Adhere this completed section to the card front with liquid glue. Stamp the sentiment onto a scrap piece of Whisper White, trim with snips and adhere as shown with liquid glue (be sure to not apply to the overhanging part).
The inside is layered and stamped to compliment the card front. And don't forget to stamp the envelope front and flap for the recipient.
I hope that my project has inspired you in some way today. Please continue along the blog hop for additional inspiration! Anne Marie is up next and I am sure you will love her inspirations!
March 2020 Third Thursdays Blog Roll
Thanks for hopping by my little corner of the world and I'm looking forward to seeing y'all again soon!!
Do you love these projects?
You can find the supply list to create them on your own at the bottom of this blog post.
I would love to be your Stampin' Up!® Demonstrator!
If you don't already have a demonstrator and need any stamping supplies, just click on the Shop picture at the top right side of my blog that goes directly to my online store. Or you can just drop me an email, if you have any questions. It would be such a pleasure to stamp with you!

About the April Kit
Subscribe by the 10th to receive.- Kit contains supplies for 8 cards and envelopes
- Card size: 4-1/4" x 5-1/2" (10.8 x 14 cm)
- Envelope size: 4-1/2" x 5-3/4" (11.4 x 14.6 cm)
Coordinating Colors: Crushed Curry, Early Expresso, Melon Mambo, Mint Macaron,
Pear Pizzazz, Shaded Spruce, and Soft Sea Foam
and you will receive one or more EXCLUSIVE PROJECT TUTORIALS for FREE!
Contact me for details!
- Visit my online store here.
- Shop the Clearance Rack here.
- Shop the NEW Mini Catalog here and see what FREE coordinating products you could possibly earn with SAB (Sale-A-Bration)!
- Still in the holiday mood? Shop the Holiday Favorites here.
- View the newest products available for Beginning Stampers here.
- Subscribe to Paper Pumpkin here.
- Earn FREE Stampin' Up! Products with my Nature's INK Points Reward Program - a special thank you program just for my online customers!
- Be a Nature's INKer with me! I love what I do and would be thrilled to have you on my team while creating, sharing and inspiring others together with you! Do you love creating projects for others? Do you love it all? Would you like to save money on your stamping and/or scrapbooking supplies? Yes?!? Click here for more info.
- Subscribe to my newsletter to get all the latest news and updates on what's happening and, do not worry, you can unsubscribe from it at any time - no questions asked!
- Follow my blog with Bloglovin.


He is so stinkin' cute. And that's before I knew he moved!
ReplyDeleteAwwww, thanks, Susan! :)
DeleteAwesome card. I like the way the layers kind of bring the bunny almost to the same height. Thank you for Sharing.
ReplyDeleteThanks Jan! Actually did the layering like that to protect the bunny for mailing. :)
DeleteYayyyy, I was hoping someone would use a spring on their card! Super cute - thanks for sharing :-D
ReplyDeleteSo glad I made you smile, Kimberley! xx
DeleteOh my goodness, I love this stamp set so much and now even more. I literally let out an "awww" when I watched the video of the wobbler bunny. Too CUTE! Love how your little scene just pops on the clean background. Ok, gotta go get my wobblers out...
ReplyDeleteAwwww, thanks, Anne Marie. So glad you enjoyed it. Can't wait to see what you create! xx
Delete