Welcome to the first Global Creative INKspirations Blog Hop of a new decade! The three of us - Tania Tobin, Danielle Kassing and myself - are teaming together to expand your creative inspirations - well, INKspirations as I call it! You are either starting here or coming from Danielle's blog. We hope that you are enjoying these special monthly posts as much as we enjoy sharing this time with you! This month we are focusing on the new 2020 January-June Mini Catalog.
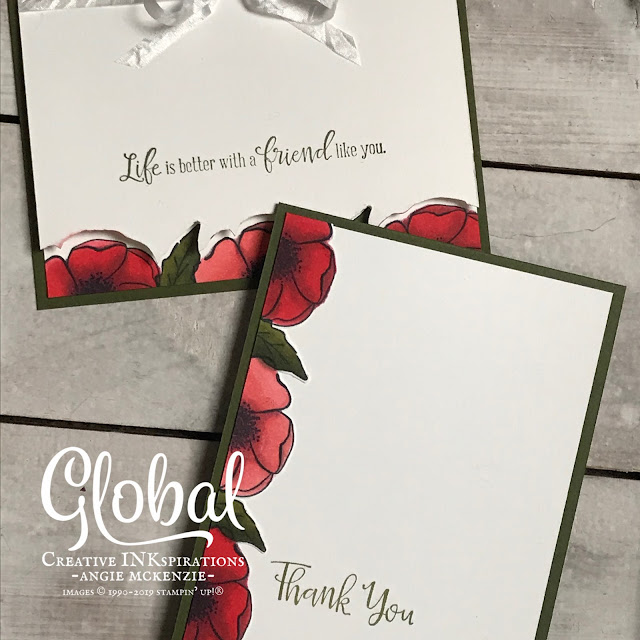
Today's cards feature the On-the-Edge Stamping technique that I didn't realize had a name until I was watching Jennifer McGuire's videos on YouTube when I was not feeling well last week. Hey, what else could I do when resting so I wouldn't spread germs, right?!? [shoulder shrug and a **WINK**]
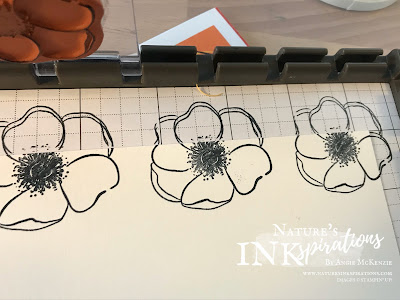
The Stamparatus came in handy for stamping the front and inside of a standard folded card base. Hinge stamping at it's best for the poppies and leaf from the Painted Poppies stamp set!
The Stamparatus came in handy for stamping the front and inside of a standard folded card base. Hinge stamping at it's best for the poppies and leaf from the Painted Poppies stamp set!
First the poppy... starting from the far right corner and moving left.
And then the leaf.
See?!? Easy, peasy, lemon squeezie!
Next, the fun begins with coloring with Blends Markers. Red, pink, red worked for me.
Any color of poppies would look fabulous!
Color the card front and back separately... as in open the card prior to coloring.
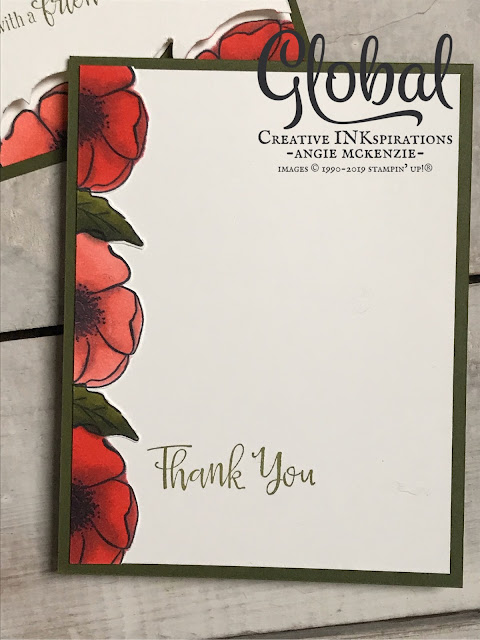
The red poppies were colored with Light Poppy Parade and Light Blackberry Bliss.
The pink poppies were colored with Light/Dark Flirty Flamingo and Light Blackberry Bliss.
The leaves were colored with Dark Olive and Dark Mossy Meadow.
After coloring, the card base was trimmed along the bottom and the side to measure 4" x 5-1/4" when folded. Next, the top colored section was fussy cut completely off. Now we have the makings for two cards!
The cut piece was aligned straight along an edge of a Whisper White layer and adhered with liquid glue. The Peaceful Moments sentiment was stamped in Old Olive and adhered to a vertical top folding Mossy Meadow card base.
The original stamped card base was adhered to a Mossy Meadow layer measuring the size of a standard card base. The sentiment was stamped in Old Olive. With the White Crinkled Seam Binding Ribbon being the finishing touch to the front.
The cut piece was aligned straight along an edge of a Whisper White layer and adhered with liquid glue. The Peaceful Moments sentiment was stamped in Old Olive and adhered to a vertical top folding Mossy Meadow card base.
And the inside was stamped and colored to compliment the front.
With a stamped sentiment on the inside, the card is done!
I hope that this has inspired you to get creative with your stamps and to use your Stamparatus! Now, let's pop over for some more inspiration across the waters with Tania! She has created a gorgeous card that will definitely inspire you... I loved it and I know you will, too.
Global Creative INKspirations Blog Hop
Angie McKenzie - US - YOU ARE HERE
Do you love these projects?
You can find the supply list to create them on your own
at the bottom of this blog post.
You can find the supply list to create them on your own
at the bottom of this blog post.
Exclusive Online Class
Click the above picture to purchase the Painted Poppies Stamp Set from my online store by February 15th and receive access to my exclusive online class where we will create these projects together at your convenience in your own craft space! CONTACT ME with any questions you may have.
I would love to be your Stampin' Up!® Demonstrator!
If you don't already have a demonstrator and need any stamping supplies, just click on the Shop picture at the top right side of my blog that goes directly to my online store. Or you can just drop me an email, if you have any questions. It would be such a pleasure to stamp with you!
Place an order of $50 or more from me during the month of JANUARY 2020
and you will receive one or more EXCLUSIVE PROJECT TUTORIALS for FREE!
- Visit my online store here. Are you new to stamping? View the newest products available for Beginning Stampers here.
- Subscribe to Paper Pumpkin here.
- Earn FREE Stampin' Up! Products with my Nature's INK Points Reward Program - a special thank you program just for my online customers!
- Be a Nature's INKer with me! I love what I do and would be thrilled to have you on my team while creating, sharing and inspiring others together with you! Do you love creating projects for others? Do you love it all? Would you like to save money on your stamping and/or scrapbooking supplies? Yes?!? Click here for more info.
- Subscribe to my newsletter to get all the latest news and updates on what's happening and, do not worry, you can unsubscribe from it at any time - no questions asked!
- Follow my blog with Bloglovin.


Wauw! What a fantastic idea with the border. Just love it.
ReplyDeleteThanks so much, Danielle. Definitely a breeze to do with the Stamparatus and coloring with the Blends is so relaxing.
DeleteBeautiful! What a fun technique. Must try this one out too.
ReplyDeleteThanks! It is indeed a fun technique... two cards in one! :)
Delete