Welcome to The Joy of Sets September 2019 Blog Hop! You are visiting Angie McKenzie from the USA. You are either starting with me or landing here after visiting the inspiring blogs of Tricia Butts (Tricia's Stamping Creations) or Libby Fens (Libby Stamps). The Joy of Sets is a closed Facebook group created by the lovely Fiona Whitehead from England. The group is full of Stampin' Up!® enthusiasts who share the love of all things Stampin' Up! - both old and new. This month's theme is Trifold Cards using any brand products.
There's nothing like a blog hop to challenge me... sure, I've made trifold money holders before but not an actual card! My parents celebrated their anniversary this past week so I made what I thought was a trifold card until I realized while watermarking the pictures that the card was a Z-fold (check back later this week for details)! So back to the crafting table... **WINK**
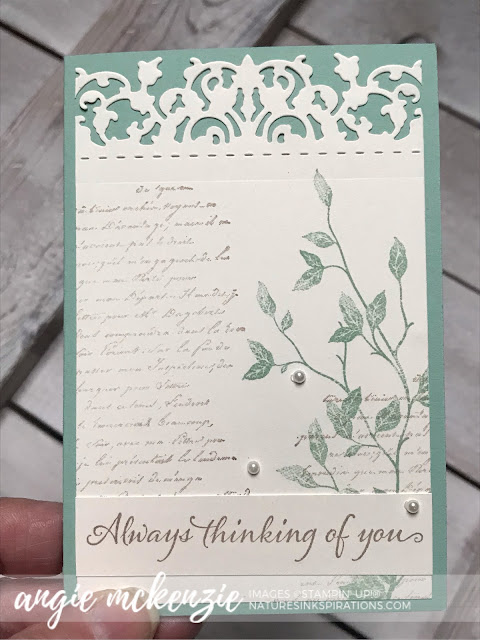
My creative juices started flowing again as I played around with my card templates. Being able to see the different sizes allowed me to determine which sizes would work best to create this fun fold without using someone else's measurements. My final decision was to use two pieces of cardstock - one for the card base and one for the panels for stamping!
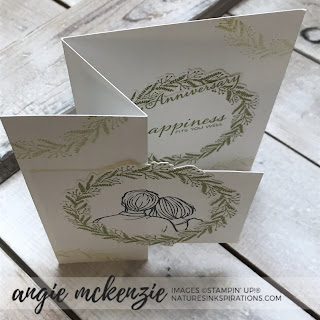
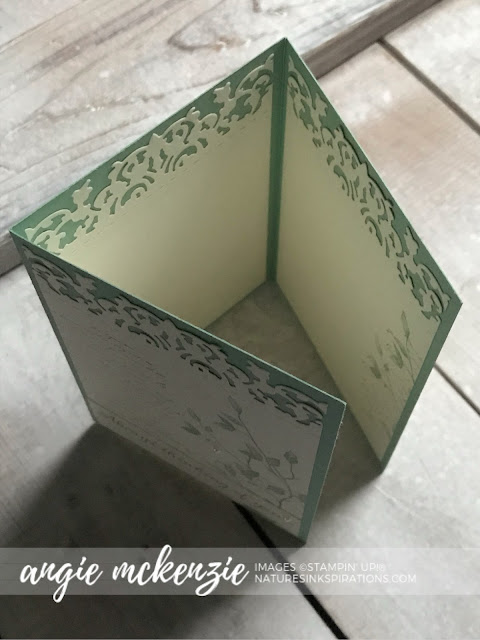
The Very Versailles stamp set was one the first three stamp sets that I fell in love with from the new Annual Catalog! Stamp the script stamp in Crumb Cake and off stamp on grid paper before stamping on the Very Vanilla layer. Stamp the leaves in Mint Macaron. Stamp complimenting patterns for each of the inside panels. Stamp the sentiment in Crumb Cake and center across a strip of 11/16" wide Very Vanilla before adhering it to the front panel. Trim the access paper with paper snips, if needed, before adhering this front layer to the card front with liquid glue. Adhere the inside panels with liquid glue. Add the pearls to the card front as a finishing touch for this special card that allows lots of writing space to the recipient.
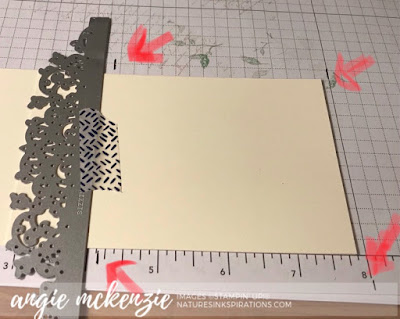
TIP WHEN USING DIES: Mark the grid paper with the finished size and line up the panel to be die cut. Align the highest point of the die to the finished size mark. Center and straighten the die by aligning it with the grid lines. Mark the bottom of the die on both sides of the layer onto the grid paper. Adhere the die with washi tape. Run the panel and die through a die cutting machine. Repeat four times.
I hope you have been inspired by my project today. There are eleven (11) of us participating in this blog hop so be sure to hop around each of the blogs to see all the inspiration as you sure don't want to miss any! Just click the PREVIOUS arrow to visit Tricia Butts or the NEXT arrow to visit Libby Fens.
Have a blessed day!
Do you love this project?
You can find the supply list to create it on your own at the bottom of this blog post.
I would love to be your Stampin' Up!® Demonstrator!
If you don't already have a demonstrator and need any stamping supplies, just click on the Shop picture at the top right side of my blog that goes directly to my online store. Or you can just drop me an email, if you have any questions. It would be such a pleasure to stamp with you!
In the new Annual Catalog, Product Suites are bundled, making ordering super easy! With one item number, you can order the stamp/die bundle at a discounted price, plus the paper and any other coordinating products, giving you everything you need for creating perfectly coordinated projects! I love this ordering option, and I know you will too. Try it!!! Just click on the above Online Shoppers Code, or any of the items in the Supply List below to go to my store. Use this Online Shoppers Code at checkout and I will send you a special thank you for your order. If your order is over $150, please don't use the code (you'll miss out on your own Stampin' Rewards if you use it) but you'll still receive something special in your mailbox from me.
Place an order of $50 or more from me during the month of SEPTEMBER 2019
and you will receive one or more EXCLUSIVE PROJECT TUTORIALS for FREE!
Contact me for details!
- Visit my online store here.
- Shop the Clearance Rack here.
- View the newest products available for Beginning Stampers here.
- Subscribe to Paper Pumpkin here.
- Earn FREE Stampin' Up! Products with my Nature's INK Points Reward Program - a special thank you program just for my online customers!
- Be a Nature's INKer! I LOVE WHAT I DO and would be thrilled to have you on my team while creating, sharing and inspiring others together WITH YOU! Do you love creating projects for others? Do you love it all? Would you like to save money on your stamping and/or scrapbooking supplies? Yes?!? Click here for more info.
- SUBSCRIBE to my newsletter to get all the latest news and updates on what's happening and, do not worry, you can UNSUBSCRIBE from it at any time - no questions asked!
- Follow my blog with Bloglovin.






Absolutely stunning card Angie. I love French boudoir and this just shouts it to me. Thank you for joining in the hop, hope to see you again next time x
ReplyDeleteThanks so much, Andrea! xx
DeleteWOW!!!! - what a card. So beautiful.
ReplyDeleteThanks so much, Linda. I appreciate it. :)
DeleteSimply stunning card design Angie. Love all the beautiful detail and the vintage feel :)
ReplyDeleteThanks so much, Tricia! You just put a smile on my face. :)
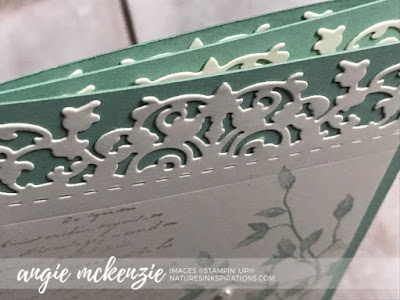
DeleteLove this Angie - the lace border across the top adds a real wow factor to the lovely images on each panel.
ReplyDeleteThanks so much, Susan. The lace border was definitely the biggest challenge of making this card! :)
DeleteThat Very Versaille is stunning love what you have done with it x
ReplyDeleteThanks so much, Jane! :)
DeleteAngie - this is so gorgeous - I have my eye on that set and just adore what you've done with it and the colours you've used. Thanks for being part of the hop again. x
ReplyDeleteThank you, Fiona! Hopefully it's made you want it even more! ;) It's always a pleasure to hop with you all.
Delete