Thanks for joining us today for the June 2018 edition of the Go for Greece Training Group Blog Hop! You are visiting Angie McKenzie in the USA. This group consists of numerous Stampin' Up!® demonstrators from around the globe working together to mentor each other to achieve goals that are indescribable! If you are a Stampin' Up!® demonstrator striving to earn the incredible incentive trips and are not a part of this group, I highly recommend that you contact Kylie Bertucci for details on how to sign up. Today I am going to share with you a picture tutorial for my favorite technique!
So what is your favorite stamping technique? I personally love creating my own backgrounds through watercoloring with the gorgeous Stampin' Up!® inks. And my most favorite way is to use the Smooshing Technique with the clear acrylic blocks on Shimmery White cardstock.
Here are the tools that you will need to get started:
- A reasonable size workspace that allows you to spray water
- Paper towel
- Acrylic block
- Stampin' Up!® Ink Pad
- Spritzer
- Aqua Painter
- Shimmery White cardstock (cut to size)
So let's get started!
 |
| STEP ONE: Apply ink to the acrylic block. |
 |
| STEP TWO: Spritz with water. The more you spritz, the lighter the color. |
 |
| STEP THREE: Lift and tilt to let the water flow. |
 |
| STEP FOUR (optional): Use the aqua painter to spread the ink. |
 |
| STEP FOUR (optional): Just the way I personally like it - full coverage. |
 |
| STEP FIVE: Quickly flip the acrylic block over onto the Shimmery White cardstock. |
 |
| STEP SIX: Now "smoosh" by turning the acrylic block. |
 |
| STEP SIX: Turn it however you like and.... |
 |
| STEP SIX: ... in as many directions as you please. |
 |
| STEP SIX: Just keep moving the block until you get the coverage that you want. I'm using only one color today, so I'm going for as much coverage as possible. |
 |
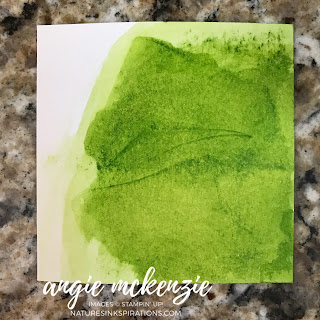
| STEP SEVEN: Remove the block and TADA! Smooshing is complete! |
 |
| STEP EIGHT (optional): I hate to waste ink; so I grabbed the aqua painter. |
 |
| STEP EIGHT (optional): And applied the ink that was on the tip from the acrylic block coverage. |
 |
| STEP NINE: Now it's done and left to completely dry! |
Now here are some cards that I made yesterday using TWO colors for the background. I allowed the first color to dry completely before applying the second color. If you dare, feel free to allow the colors to bleed together while wet!
After the background is completely dry, you can then stamp on them until your creative heart is content.
I hope you have been inspired by today's project on my blog today. You are currently visiting Angie McKenzie. Please see the list below and hop around all of the people on the list to see all our projects. You sure don't want to miss any!
Go For Greece Training Group Blog Hop List:
Thanks for hopping by and I'm looking forward to seeing ya'll again soon!!
CARD RECIPE:
Stamps: Lovely Inside & Out (retired), Lovely Wishes (retired)
Inks: Granny Apple Green, Highland Heather, Gorgeous Grape, and Whisper White Craft
Inks: Granny Apple Green, Highland Heather, Gorgeous Grape, and Whisper White Craft
Papers: Granny Apple Green, Highland Heather, Gorgeous Grape, Shimmery White and Vellum cardstocks
Other: Stampin' Trimmer; Paper Snips; Aqua Painter; Acrylic Blocks; Tombow Multipurpose Liquid Glue; Stampin' Dimensionals; Tailored Tag Punch; Lovely Words thinlits (retired)


Beautiful projects Angie x
ReplyDeleteThanks Shelly! xx
DeleteGreat tips on how to use the clear block creatively! Nice to hop with you again.
ReplyDeleteThanks Tania! xx
DeleteFantastic technique, Angie!! I love E.V.E.R.Y.T.H.I.N.G watercolour :) Great colour-combo too xx
ReplyDeleteThanks so much, Anna! (((HUGS))) across the pond xx
DeleteGreat technique, Angie. Thanks so much for sharing the tutorial. Love the cards you created with this background too.
ReplyDeleteThanks so much, Libby! xx
Delete